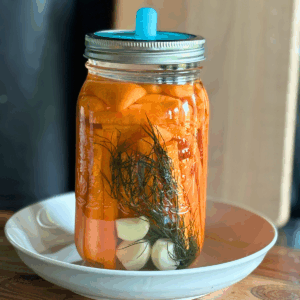
How to Make Dilly Fermented Carrots with Garlic
These crisp, garlicky fermented carrots with fresh dill are a farm-fresh favorite! Naturally preserved in a simple saltwater brine, they’re loaded with probiotics, flavor, and crunch. Perfect for snacking, topping salads, or adding a tangy kick to any meal.
Equipment
- 1 quart jar with lid or fermentation or airlock lid (fermentation jar- optional)
- 1 fermentation glass weight (or improvise by making your own fermenting weight with a clean rock, empty baby jar, or cabbage leaf!)
- Measuring spoon
- Wooden spoon or chopstick (for releasing air bubbles)
Ingredients
- 2 lbs raw carrots washed, peeled, and sliced into thin sticks
- 4 cloves of garlic peeled
- 4-5 sprigs fresh dill
- 1 tablespoon sea salt not table salt, as it contains iodine or anti-caking agents
- 2 cups non-chlorinated water filtered water
- Bay leaves optional
Instructions
Step 1: Prep the Carrots
- Wash, peel, and cut carrots into uniform sticks—about the length of your jar. Consistent size helps them ferment evenly.
Step 2: Make the Salt Brine
- Mix 1 tablespoon of salt into 2 cups of water, stirring until the salt is completely dissolved. Taste the salty brine—it should be pleasantly salty, like a light ocean breeze.
Step 3: Add Flavor
- Drop the garlic cloves and fresh dill into the bottom of your clean jar. These will infuse flavor into every bite.
Step 4: Pack the Jar
- Tightly stack the carrot sticks upright in the jar, leaving about an inch of space at the top.
Step 5: Pour the Brine
- Slowly pour the saltwater brine over the carrots until they’re completely submerged. Remove any air pockets. Use glass fermentation weights to keep the carrots below the liquid.
Step 6: Cover and Ferment
- Cover with a fermentation lid (or loosely with a regular lid) and let it sit at room temperature for 3–10 days. (DO NOT put a tight lid on the jar, as the carbon dioxide will build up and could explode the jar.)
- Around day 3, start your taste test.
- The longer it sits, the tangier it becomes.
- You’ll notice little bubbles forming—that’s the beneficial bacteria getting to work!
Step 7: Move to Cold Storage
- Once the flavor hits your liking, transfer the jar to the refrigerator to slow down the fermentation.
Notes
Special Tools (affiliate links): Fermentation Crock | Fermentation Jars | Complete Mason Jar Fermenting Kit | Glass Fermenting Weights |
Tried this recipe?Let us know how it was!
