How to Make Dilly Fermented Carrots with Garlic

Making Fermented Carrots with Dill & Garlic is crunchy, tangy, and totally addictive. Ever notice how the best snacks are often the simplest ones? Fermented carrots are proof. Crisp, garlicky, and just the right amount of tangy, these little orange sticks of joy pack a flavorful punch while doing wonders for your gut health.
Fermentation might sound fancy, but it’s actually an age-old preservation method—think of it as nature’s way of giving your veggies a second life. With just carrots, salt, garlic, dill, and a bit of patience, you’ll create a jar of probiotic goodness that’s perfect for snacking, tossing on salads, or perking up a charcuterie board.
This post may contains affiliate links. I earn a small commission from purchases at no extra cost to you. See my full disclosure here.
What you will Love about this Recipe
- Easy & Affordable: You only need a few pantry staples and fresh produce.
- Naturally Preserved: No canning required—just salt, water, and time.
- Loaded with Probiotics: Supports digestion and boosts gut health.
- Customizable: Add spices, herbs, or even chili flakes to make it your own.
- Crunchy, Tangy Goodness: A snack that’s as satisfying as it is nourishing.
The Top Benefits of Eating Fermented Carrots
Fermented vegetables like carrots are more than just delicious—they’re packed with health benefits:
- Supports Gut Health: Packed with probiotics that help balance and strengthen your gut microbiome.
- Boosts Immunity: A healthy gut supports your immune system and helps fight off illness.
- Improves Digestion: Natural enzymes in fermented foods aid in breaking down nutrients for easier absorption.
- Increases Nutrient Availability: Fermentation enhances the bioavailability of vitamins and minerals like Vitamin B, C, and K2.
- Reduces Bloating: Regular consumption helps regulate digestion and minimize discomfort from gas.
- Supports Mental Health: Gut health is linked to mood balance and mental clarity through the gut-brain connection.
- Adds Flavor Variety: Their tangy, crisp flavor adds depth to meals without added sugars or artificial preservatives.
- Naturally Preserved: Long shelf life without needing refrigeration until after fermentation—ideal for homesteaders.
- Anti-Inflammatory Properties: Fermentation promotes the growth of beneficial bacteria that help reduce inflammation in the body.
- Protects Against Harmful Bacteria: The lactic acid produced during fermentation creates an environment that inhibits harmful microbes.
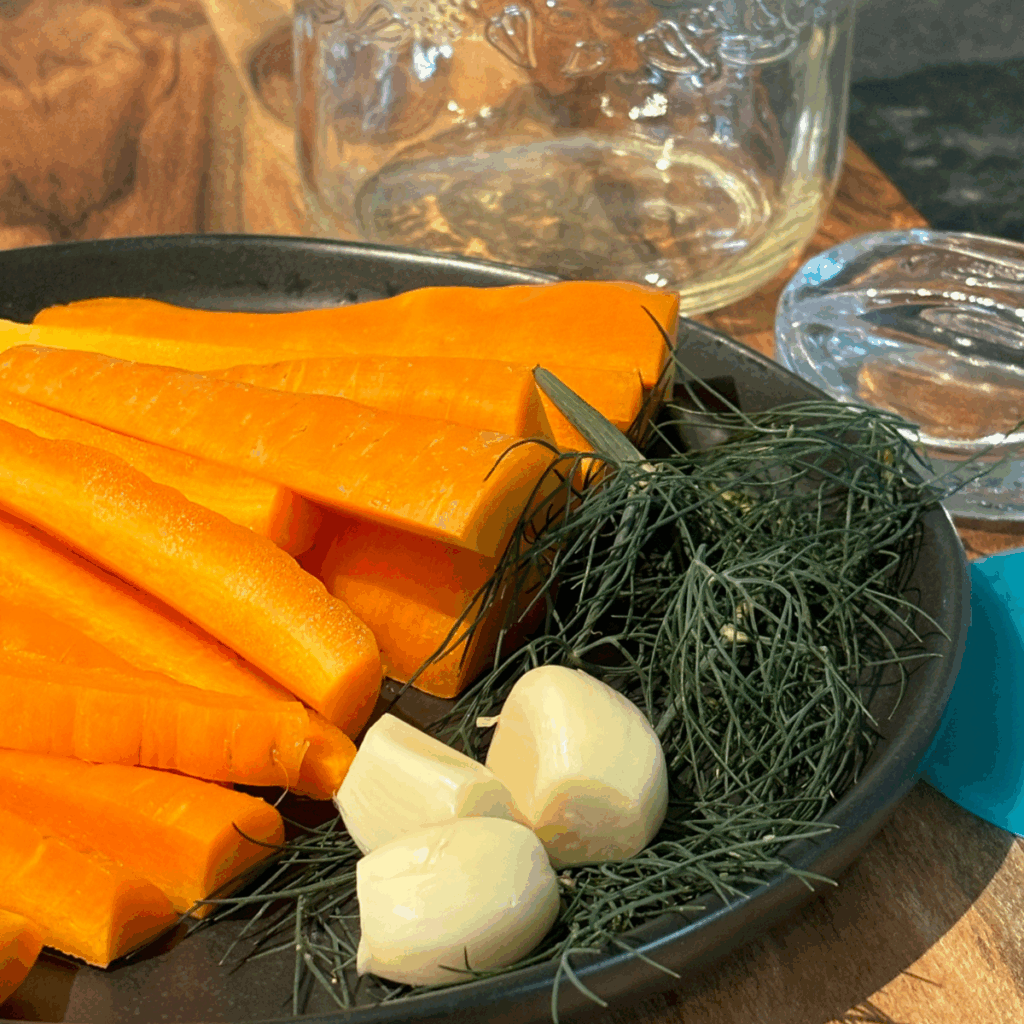
Key Ingredients to Make Fermented Carrots
- 2 lbs raw carrots, washed, peeled, and sliced into thin sticks
- 4 cloves of garlic, peeled
- 4–5 sprigs fresh dill
- 1 tablespoon sea salt (not table salt, as it contains iodine or anti-caking agents)
- 2 cups non-chlorinated water (filtered water)
- Bay leaves (optional)
Tools Needed to Make Fermented Carrots
- 1 quart jar with lid or fermentation or airlock lid (fermentation jar- optional)
- 1 fermentation glass weight (or improvise with a clean rock, empty baby jar, or cabbage leaf!)
- Measuring spoon
- Wooden spoon or chopstick (for releasing air bubbles)
Different Options for Glass Fermentation Jars
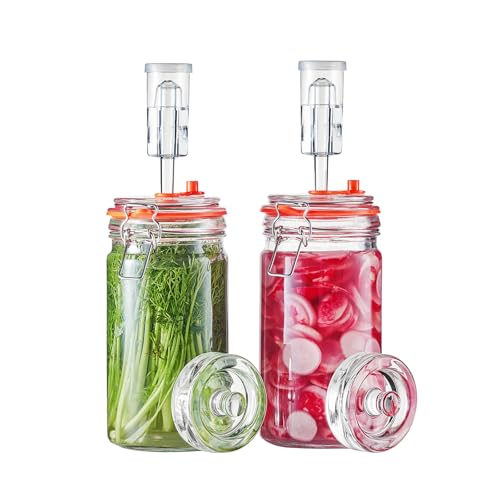
Using the right fermentation vessel makes all the difference in creating safe, consistent, and flavorful ferments. A fermentation crock provides a stable environment that keeps oxygen out and allows beneficial bacteria to thrive—perfect for larger batches. A fermentation jar with an airlock system allows gases to escape while preventing mold-causing air from entering, making it ideal for beginners who want hands-free fermentation. Meanwhile, a glass jar with a pickle pipe is a budget-friendly, small-batch option that still maintains an anaerobic environment for reliable results. Each method helps ensure your veggies stay crisp, tangy, and full of gut-loving probiotics—all while simplifying the fermentation process.
Make Easy Homemade Fermented Foods in this 2 L Crock (Kimchi, Pickles, Sauerkraut, Organic Vegetables), Medium, White

Fermentation Jar with Weight for Making Sauerkraut, Hot Sauce, Mead, Cider and More, Pack of 2
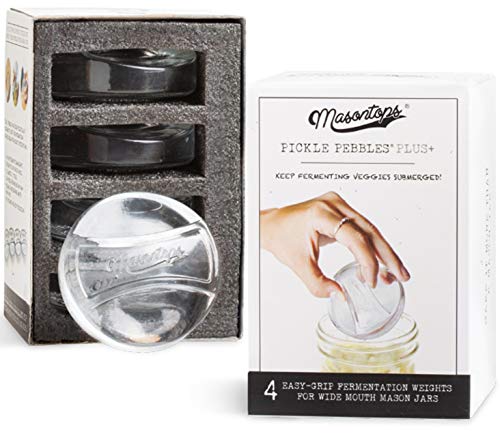
Masontops Complete Mason Jar Fermentation Kit - Pickle Kit, Sauerkraut Making Kit Kimchi Container - Fermentation Airlock Lids Wide Mouth Mason Jars

Step-by-Step Instructions to Make Dilly Fermented Carrots
- Prep the Carrots
- Wash, peel, and cut carrots into uniform sticks—about the length of your jar. Consistent size helps them ferment evenly.
- Make the Salt Brine
- Mix 1 tablespoon of salt into 2 cups of water, stirring until the salt is completely dissolved. Taste the salty brine—it should be pleasantly salty, like a light ocean breeze.
- Add Flavor
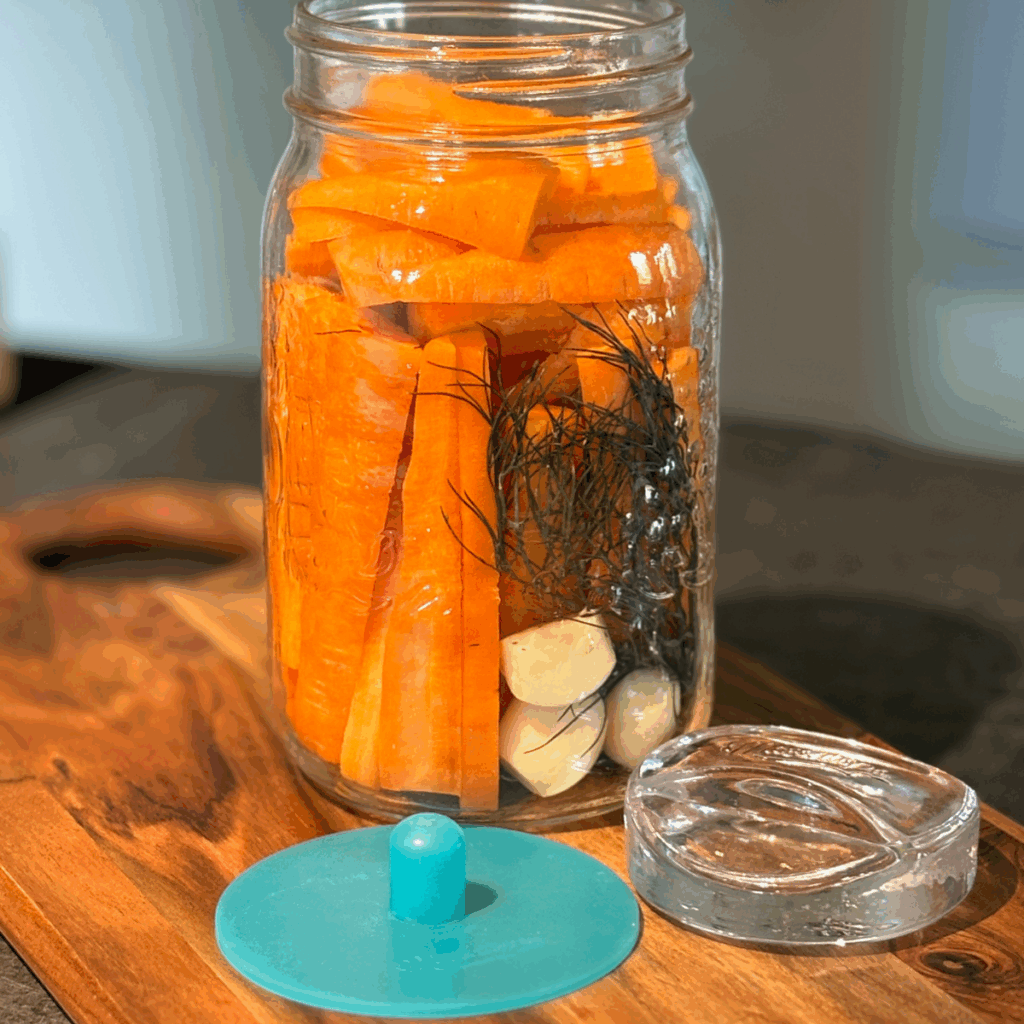
- Drop the garlic cloves and fresh dill into the bottom of your clean jar. These will infuse flavor into every bite.
- Pack the Jar
- Tightly stack the carrot sticks upright in the jar, leaving about an inch of space at the top.
- Pour the Brine
- Slowly pour the saltwater brine over the carrots until they’re completely submerged. Remove any air pockets. Use glass fermentation weights to keep the carrots below the liquid.
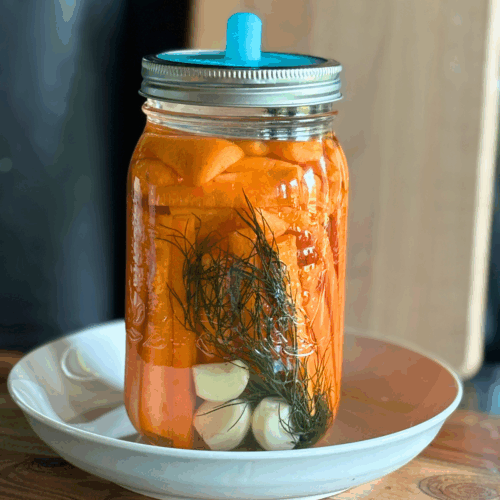
- Cover and Ferment
- Cover with a fermentation lid (or loosely with a regular lid) and let it sit at room temperature for 3–10 days. (DO NOT put a tight lid on the jar, as the carbon dioxide will build up and could explode the jar.)
- Around day 3, start your taste test. The longer it sits, the tangier it becomes.
- You’ll notice little bubbles forming—that’s the beneficial bacteria getting to work!
- Move to Cold Storage
- Once the flavor hits your liking, transfer the jar to the refrigerator to slow down the fermentation.
Troubleshooting Your Fermented Carrots
Even the best fermenters run into a few bumps along the way. Don’t worry—fermentation is as much an art as it is a science. Here’s how to recognize (and fix) the most common issues you might encounter with your fermented carrots.
Mold vs. Kahm Yeast: Know the Difference
When you lift that lid, you might notice a film or spots on top of your brine. Don’t panic! Not everything floating on your ferment means it’s gone bad.
Mold
What it looks like: Fuzzy, raised, or patchy growths—usually white, green, blue, or black.
What it smells like: Musty, sour, or just plain “off.”
What to do: Unfortunately, if you spot mold, it’s safest to toss the batch. Mold can produce toxins that seep into the brine.
How to prevent it:
- Keep all veggies fully submerged under the brine (oxygen invites mold).
- Use a fermentation weight or a clean cabbage leaf to press everything down.
- Store jars in a cool, dark spot (65–70°F is ideal).
Kahm Yeast
What it looks like: A thin, white, milky film on top of the brine.
What it smells like: Slightly yeasty or cheesy—but not rotten.
What to do: Kahm yeast is harmless. Just skim it off with a clean spoon before moving your jar to the fridge. The carrots underneath are perfectly safe to eat.
How to prevent it:
- Maintain a clean fermentation setup by sterilizing jars and utensils.
- Avoid using iodized salt, as it can inhibit the growth of beneficial bacteria.
- Keep your ferment away from direct sunlight and heat sources.
Other Common Issues
Carrots Too Soft?
Your brine might’ve been too weak, or the room too warm. Next time, try a touch more salt or a cooler fermentation spot.
Carrots Too Salty?
Soak them in fresh water for 30 minutes before eating to tone down the saltiness.
Brine Level Dropping?
- Evaporation or absorption can happen. Just top it off with a bit more saltwater brine (same ratio: 1 tablespoon of salt per 2 cups of water). The key is to have enough brine to cover the vegetables.
Homesteader’s Tip:
A successful ferment smells pleasantly sour and earthy—not rotten or fishy. Trust your nose—it’s your best fermentation tool!
Serving Suggestions for Fermented Carrots
- Snack Straight from the Jar: Crunchy and refreshing.
- Add to Salads: Slice thinly for a zesty kick.
- Tuck into Tacos or Wraps: Adds acidity that balances richness.
- Charcuterie Board Star: Pairs perfectly with cheeses and cured meats.
- Gut-Healthy Side Dish: Great alongside grilled meats or sandwiches.
How Store Fermented Carrots
Once your carrots are fermented to perfection, keep the jar in the fridge. They’ll last for 2–3 months (if they don’t disappear sooner). Always ensure the carrots remain submerged in brine—if the liquid level drops, top it off with a little extra saltwater.
Frequently Asked Questions:
1. How long do fermented carrots last?
Stored in the fridge, they’ll keep for up to 3 months—sometimes even longer if kept submerged in brine.
2. Can I use baby carrots instead?
Yes! Just be sure to cut them so they pack tightly and ferment evenly.
3. What if my brine turns cloudy?
Totally normal! That’s the natural byproduct of fermentation. If you see mold or smell something rotten, discard it immediately.
4. Do I need special equipment?
Nope! While fermentation lids are helpful, a simple mason jar with a loose lid works just fine.
5. My carrots are soft—what went wrong?
Soft carrots usually indicate a fermentation temperature that is too warm or insufficient salt. Aim for a cool, dark spot (around 65–70°F).
Special Tools (affiliate links): Fermentation Crock | Fermentation Jars | Complete Mason Jar Fermenting Kit | Glass Fermenting Weights |
And there you have it—a simple, old-fashioned recipe that turns chopped carrots into a tangy, probiotic-rich, delicious snack that’s good for your gut and your soul. Whether you’re new to fermentation or a seasoned homesteader, this recipe is an easy way to bring a little magic to your kitchen.
Next time you’re craving something crunchy, skip the chips and reach for your jar of fermented carrots—you’ll taste the love (and the science) in every bite.
Try it out, and let me know how it turns out! Tag me on Instagram and Facebook @grindinggearsfarmstead to share your fermenting journey.
Lechyd Da, (means “Cheers to Good Health” in Welsh)

How to Make Dilly Fermented Carrots with Garlic
Equipment
- 1 quart jar with lid or fermentation or airlock lid (fermentation jar- optional)
- 1 fermentation glass weight (or improvise by making your own fermenting weight with a clean rock, empty baby jar, or cabbage leaf!)
- Measuring spoon
- Wooden spoon or chopstick (for releasing air bubbles)
Ingredients
- 2 lbs raw carrots washed, peeled, and sliced into thin sticks
- 4 cloves of garlic peeled
- 4-5 sprigs fresh dill
- 1 tablespoon sea salt not table salt, as it contains iodine or anti-caking agents
- 2 cups non-chlorinated water filtered water
- Bay leaves optional
Instructions
Step 1: Prep the Carrots
- Wash, peel, and cut carrots into uniform sticks—about the length of your jar. Consistent size helps them ferment evenly.
Step 2: Make the Salt Brine
- Mix 1 tablespoon of salt into 2 cups of water, stirring until the salt is completely dissolved. Taste the salty brine—it should be pleasantly salty, like a light ocean breeze.
Step 3: Add Flavor
- Drop the garlic cloves and fresh dill into the bottom of your clean jar. These will infuse flavor into every bite.
Step 4: Pack the Jar
- Tightly stack the carrot sticks upright in the jar, leaving about an inch of space at the top.
Step 5: Pour the Brine
- Slowly pour the saltwater brine over the carrots until they’re completely submerged. Remove any air pockets. Use glass fermentation weights to keep the carrots below the liquid.
Step 6: Cover and Ferment
- Cover with a fermentation lid (or loosely with a regular lid) and let it sit at room temperature for 3–10 days. (DO NOT put a tight lid on the jar, as the carbon dioxide will build up and could explode the jar.)
- Around day 3, start your taste test.
- The longer it sits, the tangier it becomes.
- You’ll notice little bubbles forming—that’s the beneficial bacteria getting to work!
Step 7: Move to Cold Storage
- Once the flavor hits your liking, transfer the jar to the refrigerator to slow down the fermentation.