Baked Cheesecake in a Jar: A Step-by-Step Guide
Written by Kathy Moulding

Enter into the world of a baked cheesecake in a jar. Perfectly portioned, these little desserts are simple to prep and fun to share. Whether you’re hosting a party or want a treat for yourself, mason jar cheesecakes balance convenience with absolute indulgence. Here is your step-by-step guide to making a baked cheesecake in a jar.
This post may contains affiliate links. I earn from purchases at no extra cost to you. See my full disclosure here.
Why You’ll Love This Mini Cheesecake Recipe!
- Perfectly Portioned – No slicing required! These mini cheesecakes are baked right in mason jars, making them easy to serve.
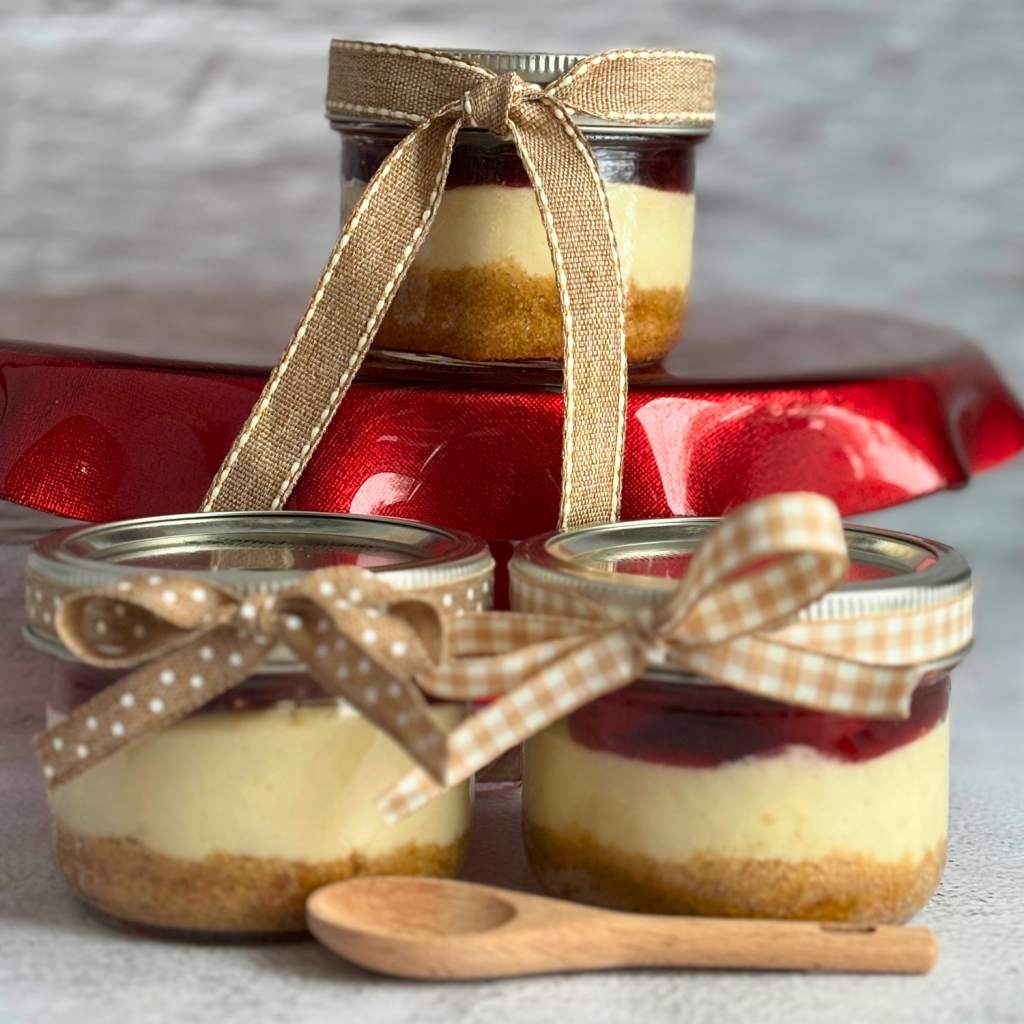
- Adorably Giftable – Wrap them with a ribbon or festive tag, and you have a homemade gift that feels thoughtful and special.
- Simple and Delicious – With minimal ingredients and straightforward steps, anyone can master this recipe.
- Customizable Toppings —You can dress them up with fruit, chocolate, or caramel to make them unique for any occasion..
Ingredients for Baked Cheesecake in a Jar
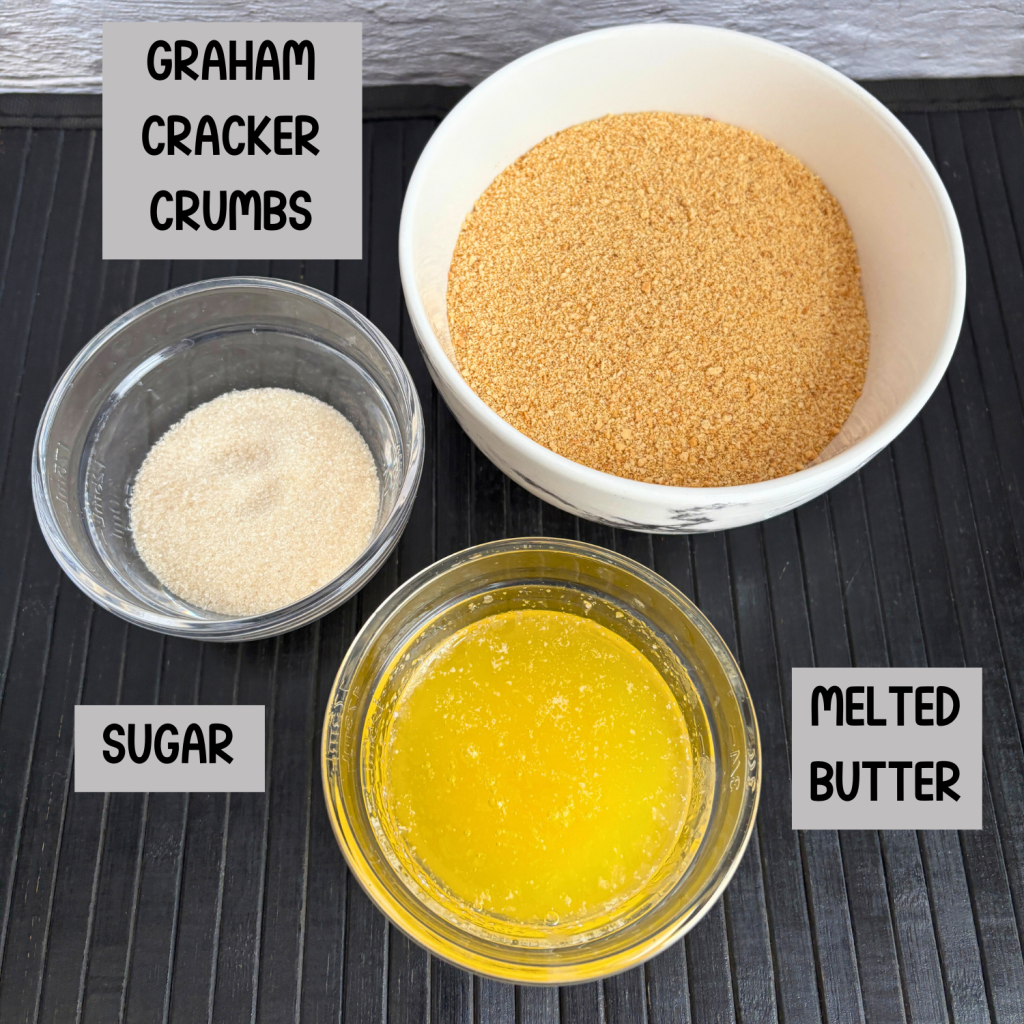
For the Graham Cracker Crust:
- 1 cup graham cracker crumbs
- 2 tbsp sugar
- 4 tbsp melted butter
For the Cheesecake Filling:
- 1/2 cup lemon juice
- 2 (8 oz) blocks cream cheese, softened
- 1/2 cup sugar
- 2 large eggs
- 1 tsp vanilla extract
- 1/2 cup sour cream
Step-by-Step Instructions for Baked Cheesecake in a Jar
Preheat and Prep
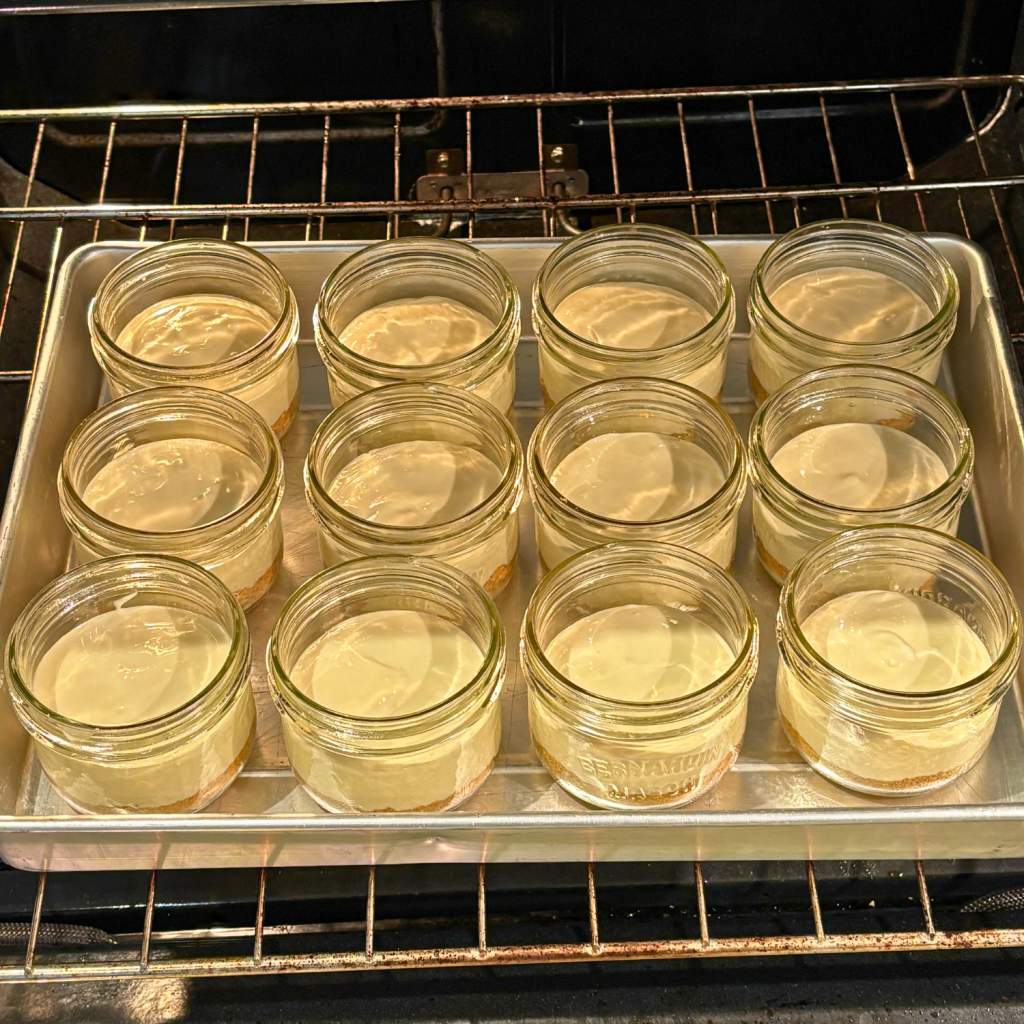
- Place twelve 4-ounce mason jars on a baking sheet or cake pan.
- Preheat your oven to 325°F (163°C). A lower oven temperature helps prevent cracks.
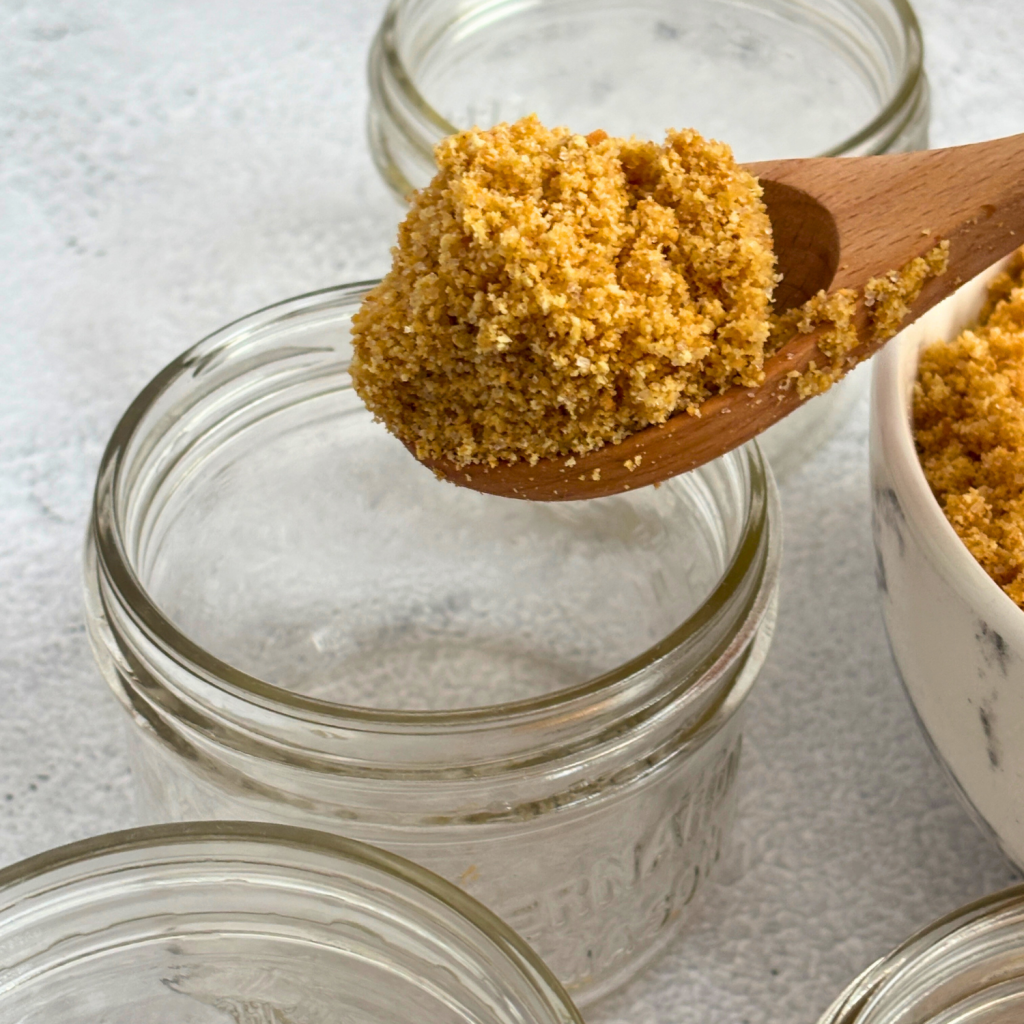
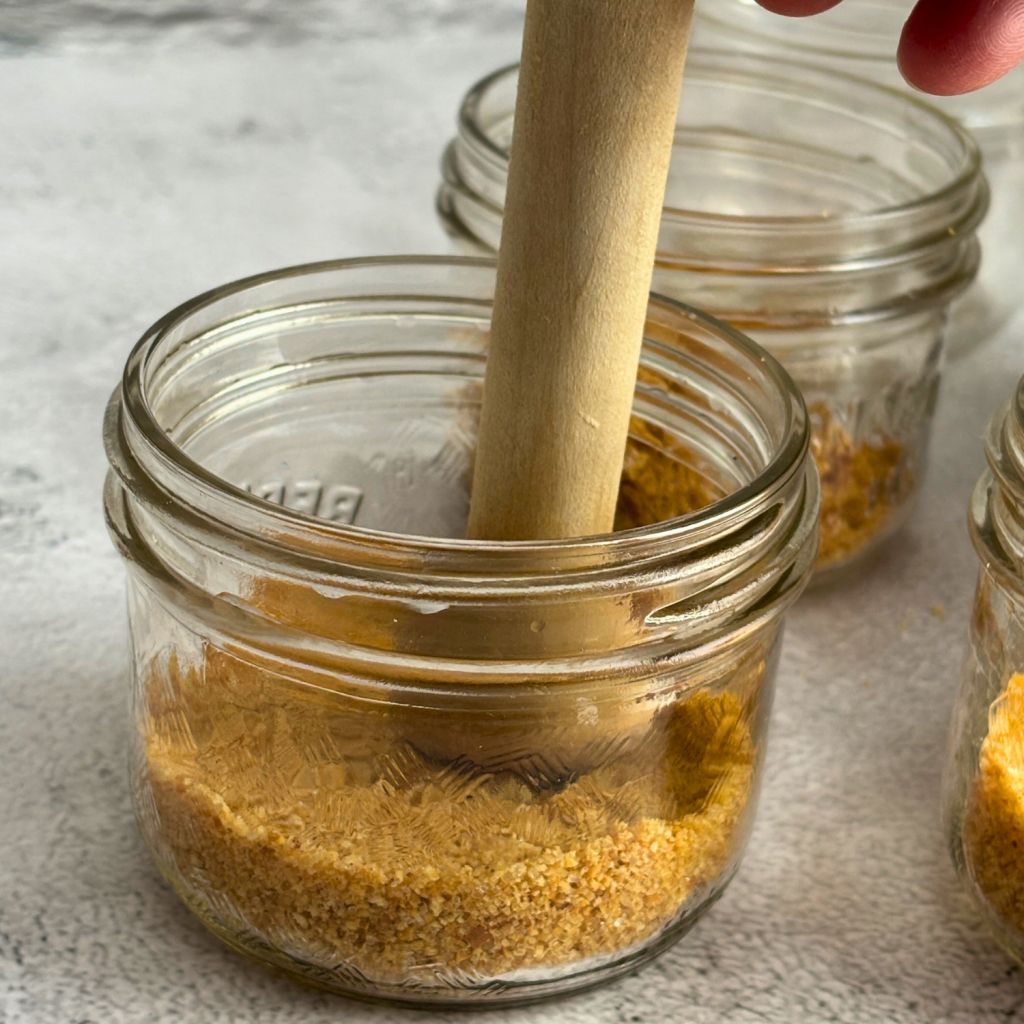
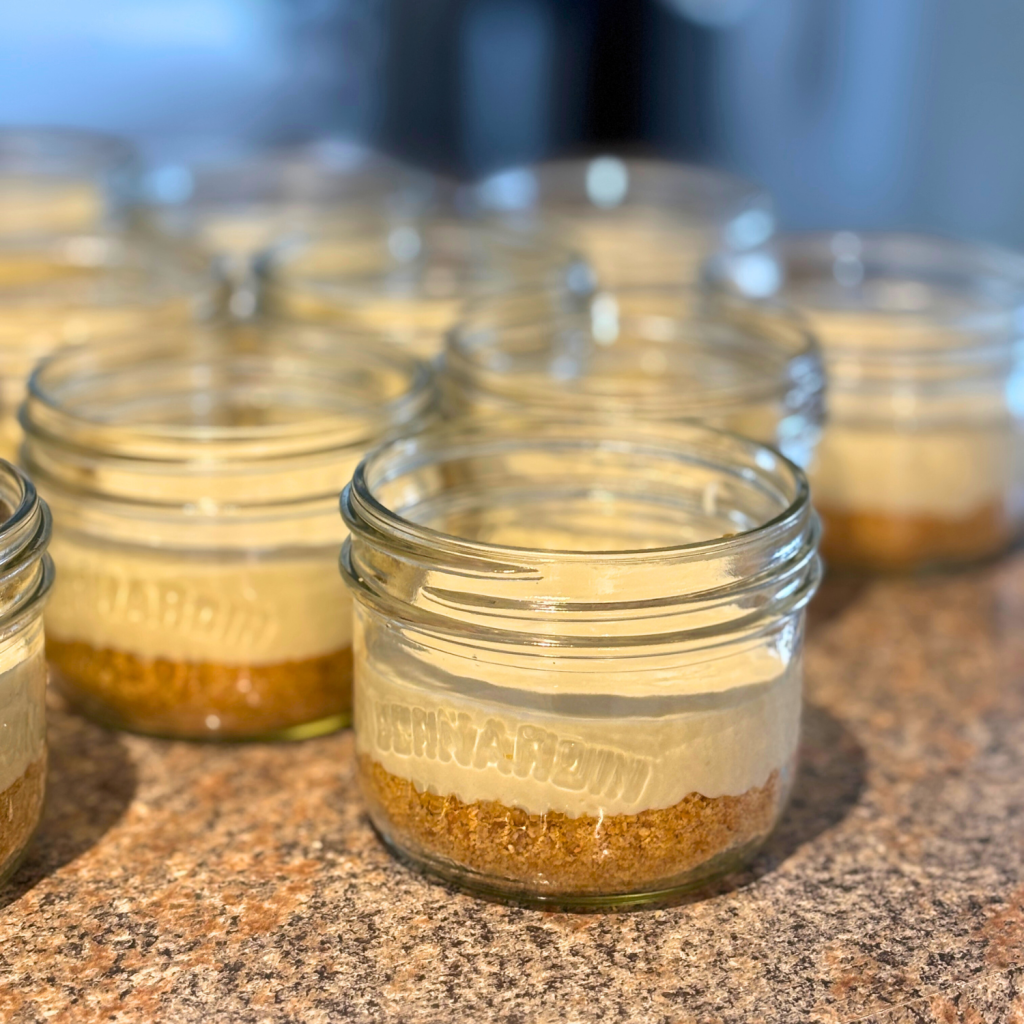
Make the Buttery Graham Cracker Crust
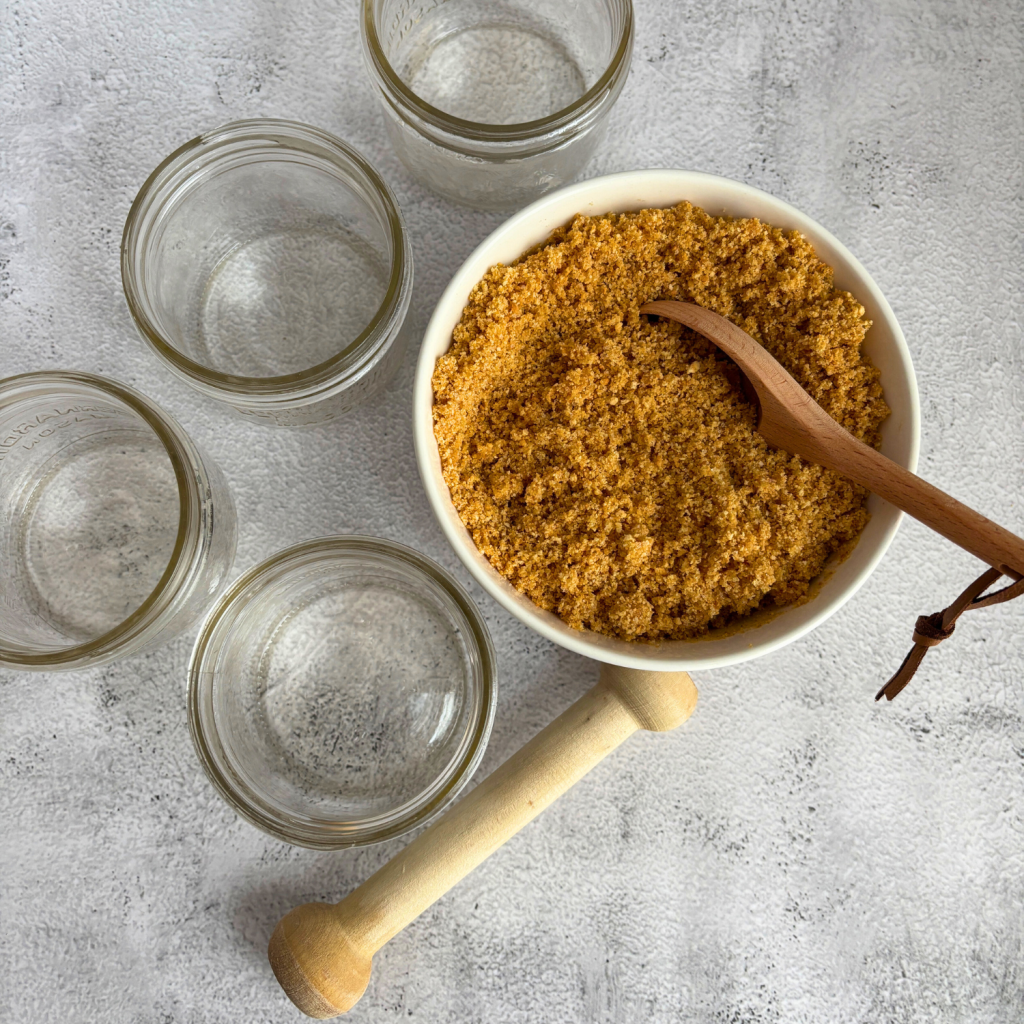
- In a small bowl, combine graham cracker crumbs, sugar, and melted butter. Stir until the mixture resembles wet sand.
- Spoon about 2-3 tablespoons of the crust mixture the mini mason jars (4-ounce jars work great).
- Use the back of a spoon or the bottom of a shot glass to press it firmly into the bottom of the individual jars.
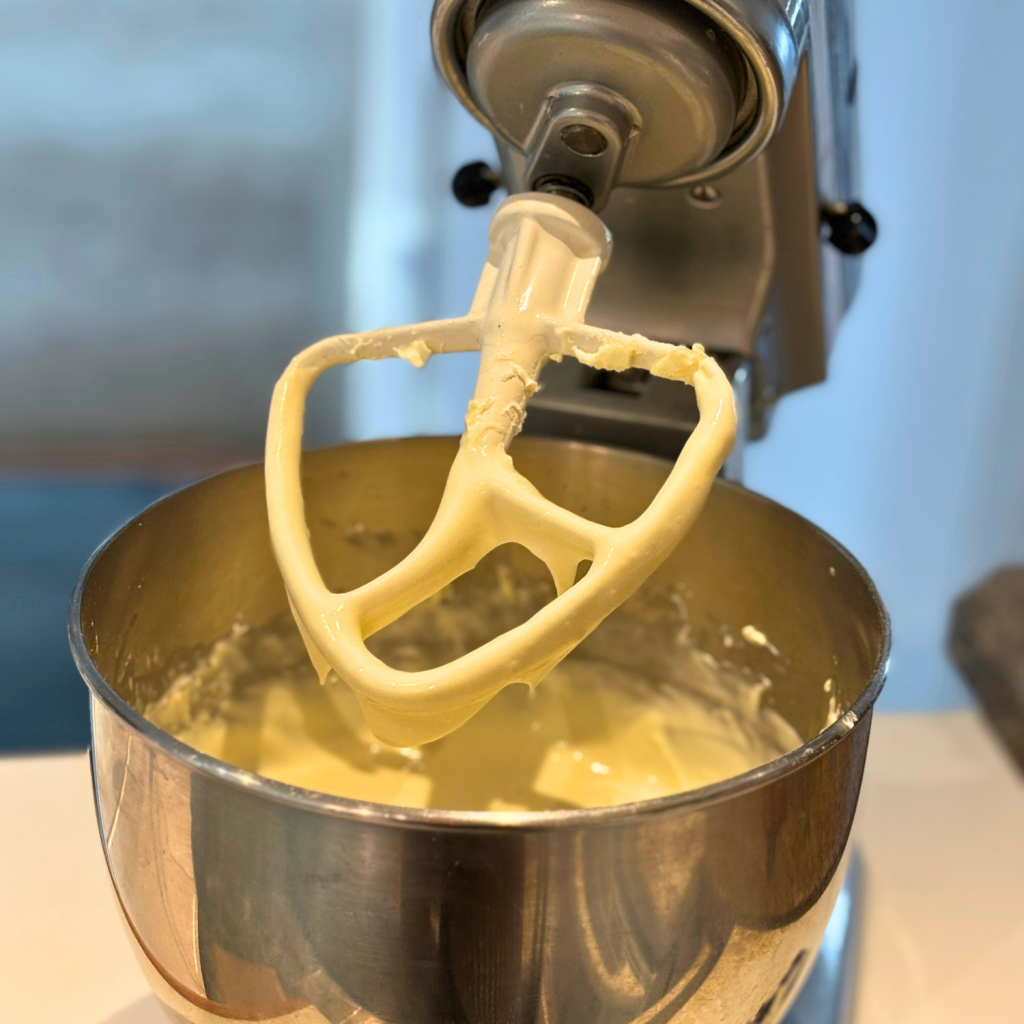
Prepare the Cream Cheese Mixture
- Soften Cream Cheese, start with softened cream cheese at room temperature. This helps avoid any annoying lumps.
- Use an electric mixer, stand mixer with paddle attachment or the bowl of a food processor on medium speed to blend everything until silky smooth. Using a rubber spatula scrap down the sides of the bowl. Overmixing isn’t your friend here—just work it until combined.
- Add the eggs one at a time, mixing well after each addition.
- Stir in vanilla extract and sour cream until fully incorporated.
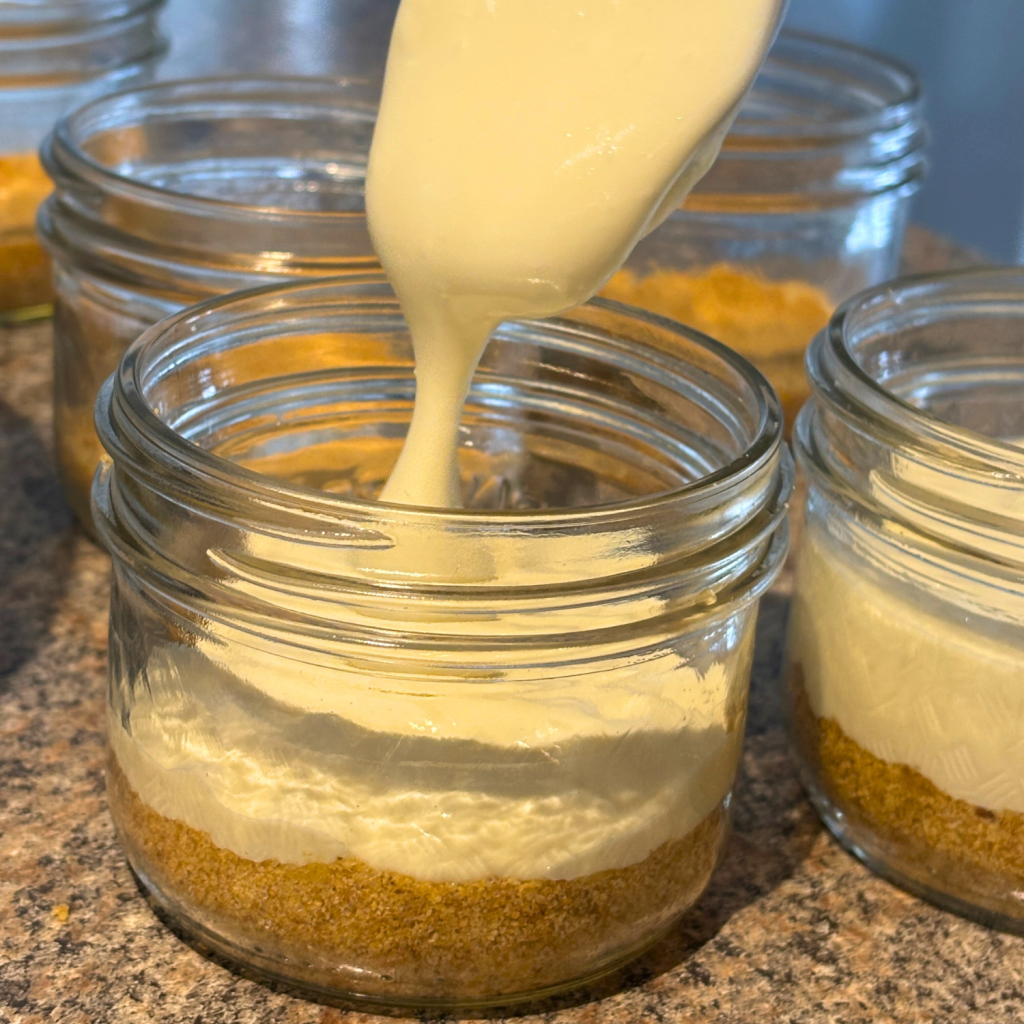
Fill the Jars
- Carefully spoon or pipe the filling on top of the crust in each jar. Fill it about 1/2- 3/4 full to leave space for baking expansion. Lightly tap the jars to release any air bubbles.
Bake
- Preheat the Oven: Set your oven to 325°F (163°C). A lower temperature helps prevent cracks.
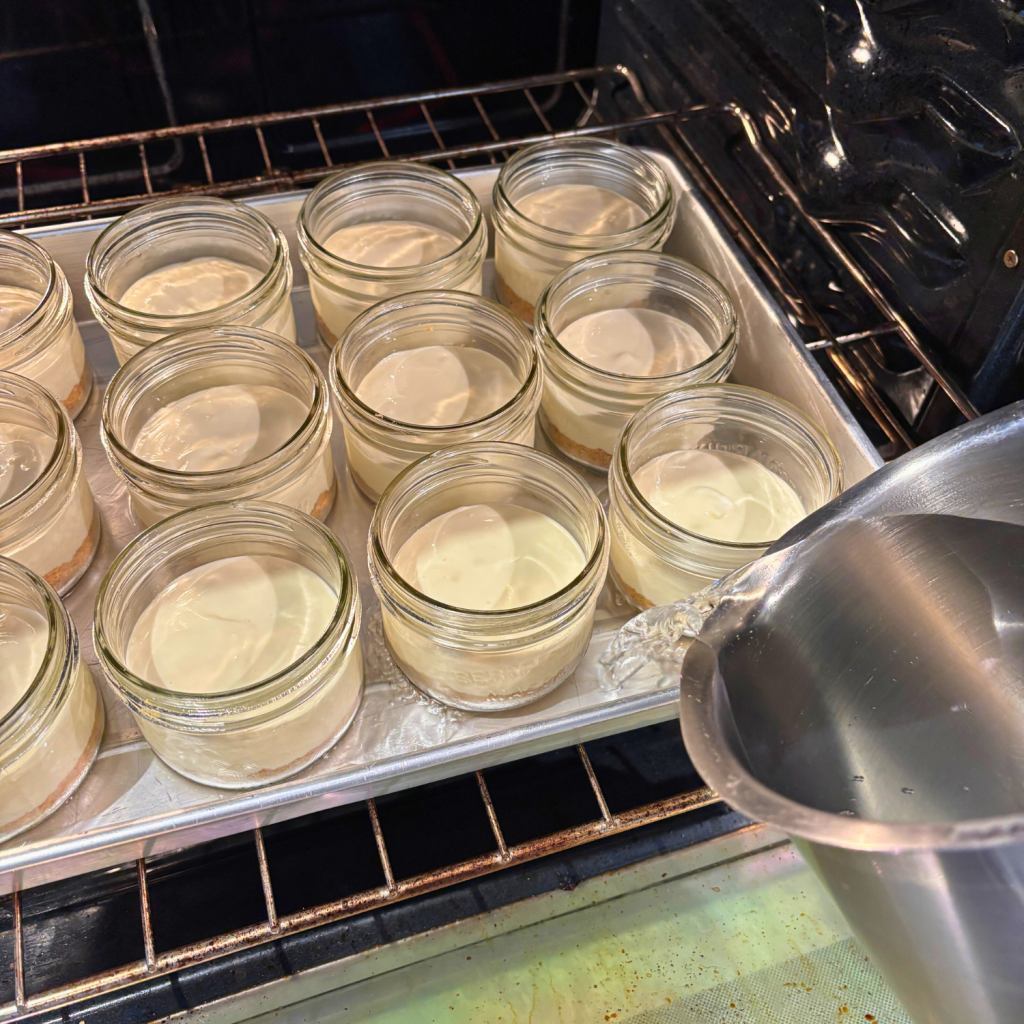
- Prepare the Water Bath: Place the jars in a deep baking or roasting pan and pour hot water around them until it reaches about halfway up the sides of the jars. This keeps the bake even and prevents the dreaded cheesecake cracks.
- Bake: Carefully slide the dish into the oven and bake for about 25-30 minutes. The centers should look slightly jiggly but set. Don’t overbake; they firm up as they cool.
- Once baked, handle the jars with care—they’ll be hot!
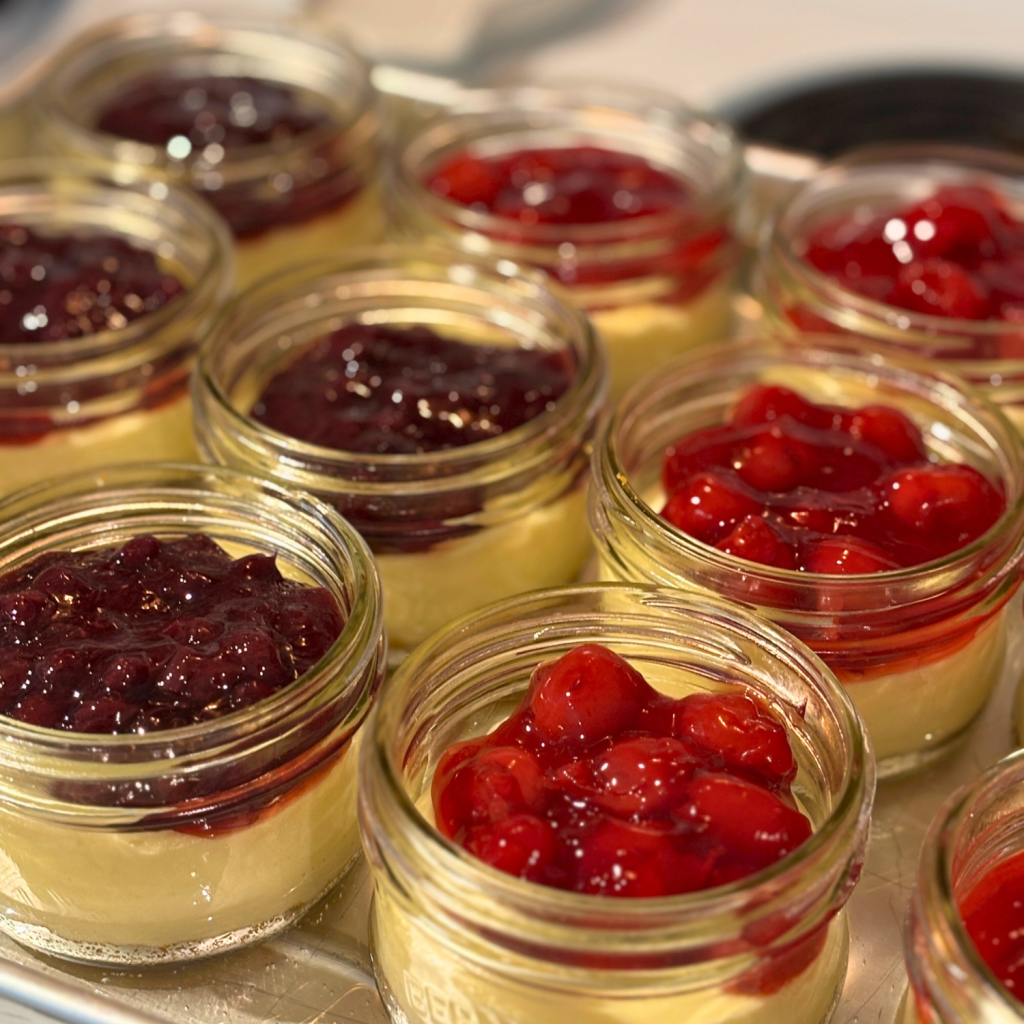
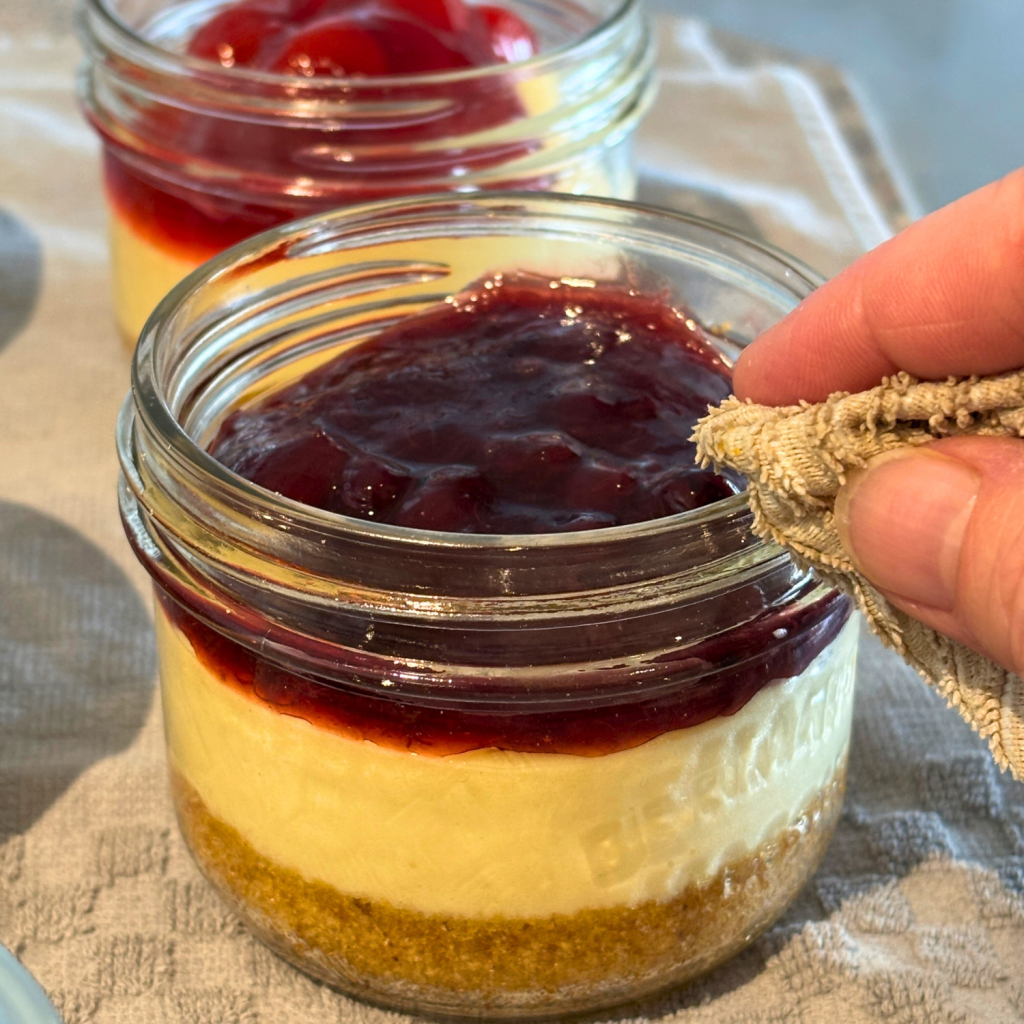
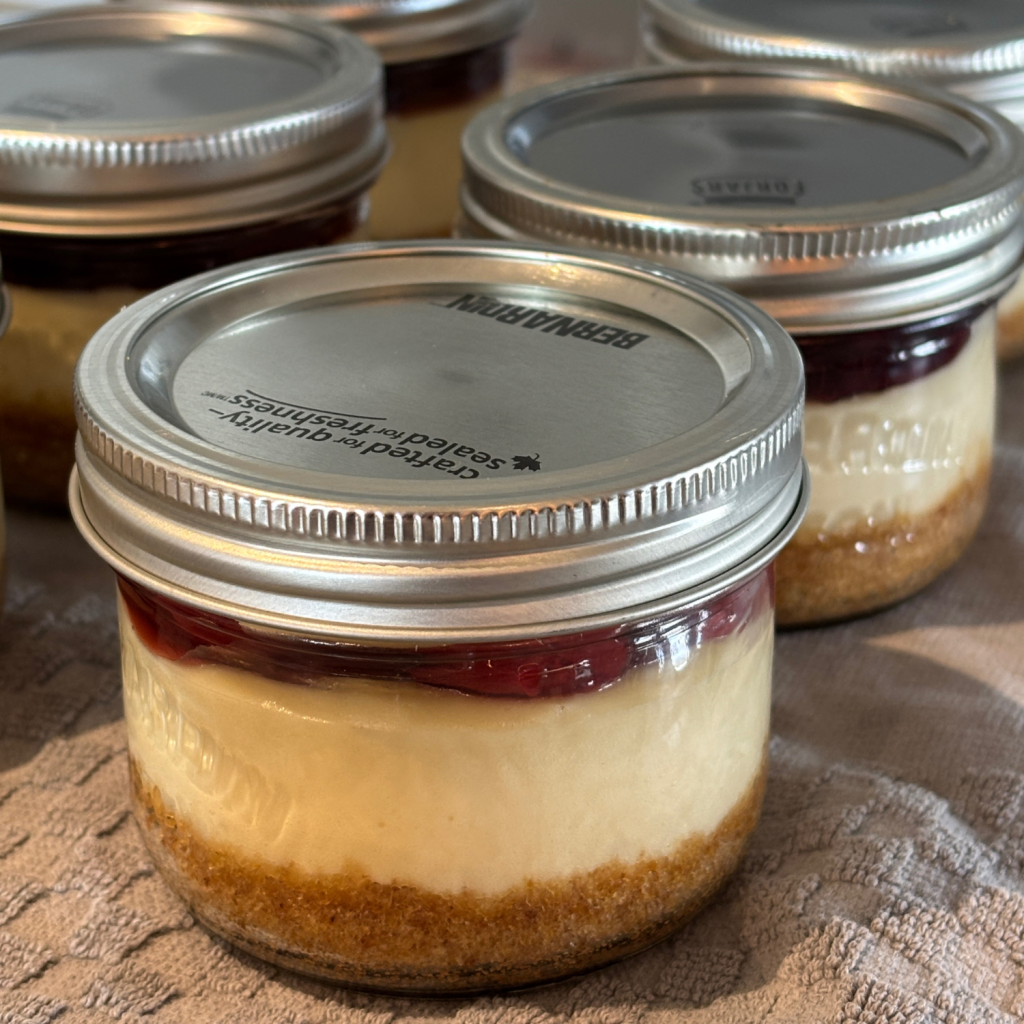
- Spoon your favorite topping onto the baked cheesecake. Wipe the rims and carefully place a canning lid and ring on each jar.
- Place back into the oven for 5-7 minutes.
- Carefully remove each of the bake cheesecake jars onto a wire rack.
- Let them cool completely before refrigerating for at least 3 hours (or overnight for best results).
- These jars will seal when using canning lids and rings, so you will hear the “ping” as the jars seal.
Topping Suggestions for Baked Cheesecake in a Jar
Let’s face it, it is the topping that makes the cheesecake! Here is where you can really customize the flavors.
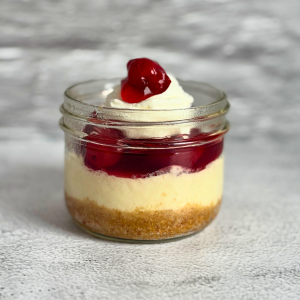
- Fresh Berries or other Fresh Fruit – Top with berries, sliced mango, or kiwi for a refreshing finish.
- Cherry Pie Filling – When you want that classic New York style Cheesecake
- Chocolate Sauce – A generous drizzle of chocolate sauce adds decadence.
- Homemade Caramel Sauce and Sea Salt – Sweet and salty lovers will enjoy this combo.
- Whipped Cream – Keep it classic with a dollop of whipped cream and a sprinkle of cocoa powder.
- Crushed Cookies – Sprinkle crushed Oreos or Biscoff cookies for added crunch..
Crust Variations
- Oreo Crust – Substitute graham crackers with crushed Oreo cookies for a rich, chocolatey base.
- Biscoff Crust – Use Biscoff cookies for a spiced, caramel-like flavor.
- Pretzel Crust – Crushed pretzels add a salty crunch that pairs perfectly with sweet cheesecake.
- Gingersnap Crust – For a holiday twist, use gingersnap cookies to add warmth and spice.
Storage Recommendations
Once your cheesecakes are baked to perfection, how you store them matters just as much as how you made them. Proper storage keeps the texture creamy, and the flavors fresh.
- Cool Completely First: Never place warm cheesecakes directly in the fridge. Condensation will form and make your crust soggy. Instead, let the jars cool to room temperature before refrigerating.
- Use Airtight Seals: Mason jars come with built-in lids that create an airtight seal. This keeps your cheesecakes fresh and prevents fridge odors from sneaking in. Always double-check that the lids are screwed on tightly.
- Refrigerate for the Perfect Chill: Cheesecakes develop their best flavor and texture when they rest in the fridge for at least 3-4 hours, or overnight if possible. It’s worth the wait!
- Label and Date: Dealing with multiple jars? Slap a label with today’s date on each one. Mason jar cheesecakes can be stored in the fridge for up to 5-7 days. After that, they may lose their creamy magic.
- Freezing for Longer Storage: Want to prep ahead for a special occasion? Cheesecakes freeze beautifully. Wrap each jar tightly in plastic wrap, then in aluminum foil, and they’ll last in the freezer for up to 2 months. Thaw in the fridge overnight before serving.
Frequently Asked Questions:
1. Can I use larger mason jars?
Yes, but adjust the baking time. Larger jars may take 35-40 minutes to bake.
2. Can I make these cheesecakes ahead of time?
Absolutely! These can be made up to 3 days in advance and stored in the refrigerator. Longer if you have used the lids and rings and have achieved a seal.
3. Can I freeze mason jar cheesecakes?
Yes! Cover tightly and freeze for up to 1 month. Thaw in the fridge overnight before serving.
4. How do I prevent cracks in the cheesecake?
Avoid overmixing the batter and don’t overbake. A slight jiggle in the center is normal and ensures a creamy texture.
5. What size mason jars work best?
4 oz mason jars are ideal for this recipe, providing the perfect portion for individual servings.
These mason jar cheesecakes combine a classic flavor with a perfect size for individual servings, making them a great option for any occasion. This easy cheesecake recipe is sure to impress your guests or satisfy your dessert cravings. Enjoy!
Special Tools (affiliate links): 4 ounce mason jars and lids
If you try this recipe and love it, please tag me on Instagram and Facebook @grindinggearsfarmstead.
Lechyd Da, (means “Cheers to Good Health” in Welsh)

Baked Cheesecake in a Jar
Ingredients
For the Graham Cracker Crust
- 1 cup graham cracker crumbs
- 2 tbsp sugar
- 4 tbsp melted butter
For the Cheesecake Filling
- 1/2 cup lemon juice
- 2 8 oz blocks cream cheese, softened
- 1/2 cup sugar
- 2 large eggs
- 1 tsp vanilla extract
- 1/2 cup sour cream
Instructions
Make the Graham Cracker Crust
- In a small bowl, combine graham cracker crumbs, sugar, and melted butter. Stir until the mixture resembles wet sand.
- Spoon about 2-3 tablespoons of the crust mixture the mini mason jars (4-ounce jars work great). Use the back of a spoon or the bottom of a shot glass to press it firmly into the bottom of the individual jars.
Prepare the Cream Cheese Mixture
- Soften Cream Cheese, start with softened cream cheese at room temperature. This helps avoid any annoying lumps.
- Use an electric mixer, stand mixer with paddle attachment or the bowl of a food processor on medium speed to blend everything until silky smooth. Using a rubber spatula scrap down the sides of the bowl. Overmixing isn’t your friend here—just work it until combined.
- Add the eggs one at a time, mixing well after each addition.
- Stir in vanilla extract and sour cream until fully incorporated.
Fill the Jars
- Carefully spoon or pipe the filling on top of the crust in each jar. Fill it about ¾ full to leave space for baking expansion. Lightly tap the jars to release any air bubbles.
Bake and Cool
- Preheat the Oven: Set your oven to 325°F (163°C). A lower temperature helps prevent cracks.
- Prepare the Water Bath: Place the jars in a deep baking or roasting pan and pour hot water around them until it reaches about halfway up the sides of the jars. This keeps the bake even and prevents the dreaded cheesecake cracks.
- Bake: Carefully slide the dish into the oven and bake for about 25-30 minutes. The centers should look slightly jiggly but set. Don’t overbake; they firm up as they cool.
- Once baked, handle the jars with care—they’ll be hot! Carefully place a canning lid and ring on each jar. Place back into the oven for 5-7 minutes.
- Carefully remove each of the bake cheesecake jars onto a wire rack.
- Let them cool completely before refrigerating for at least 3 hours (or overnight for best results). These jars will seal when using canning lids and rings, so you will hear the “ping” as the jars seal.