How to Can Cranberry Juice: Easy Homemade Recipe
Written by: Kathy Moulding

Do you want to learn how to can cranberry juice with this easy homemade recipe? Canning your own cranberry juice is easier than you might think, and it’s incredibly rewarding, too. Whether prepping for the holidays or stocking up your pantry, homemade cranberry juice is versatile, tasty, and free from unnecessary additives. It’s perfect for making festive drinks, adding to recipes, or enjoying on its own.
This post may contains affiliate links. I earn from purchases at no extra cost to you. See my full disclosure here.
Benefits of Consuming Cranberries
Adding cranberries to your diet has many benefits, especially if canned without the sugar. These include:
- Cranberries contain antioxidants, including flavonoids, vitamin C, and quercetin. These compounds protect the body from free radical damage, reducing oxidative stress and inflammation.
- Cranberries are well-known for preventing urinary tract infections (UTIs). They contain proanthocyanidins, which help prevent harmful bacteria (like E. coli) from sticking to the walls of the urinary tract.
- Cranberries may help manage cholesterol by improving HDL (good cholesterol) levels and reducing LDL (bad cholesterol) oxidation.
- Cranberries can enhance gut health by promoting a balanced microbiome. The fiber in fresh cranberries aids digestion and supports bowel regularity.
What you will Love about this Recipe!
- Fresh and Pure Flavor: Made with just a few simple ingredients, this juice captures the natural tartness of cranberries without artificial additives.
- Versatile and Customizable: Adjust the sweetness, add spices like cinnamon or cloves, or keep it simple for a classic taste—this recipe suits any palate.
- Long Shelf Life: Properly canned, it stays fresh for up to a year, giving you a ready supply of homemade juice for drinks, recipes, or special occasions.
- Cost-Effective and Eco-Friendly: Save money by making your juice in bulk while reducing waste with reusable jars.
- Health-Packed Goodness: Loaded with antioxidants, vitamins, and no unnecessary preservatives, it’s a wholesome choice you can feel great about.
Ingredients Needed to Make This Delicious Juice!
Before we dive into the process, gather these essential tools to make your canning experience smooth and stress-free:
- Cranberries – When it comes to cranberries, you have two options: fresh or frozen. Fresh cranberries are abundant in the fall and have a slightly firmer texture and brighter tartness. When it’s cranberry season, I often pick up several bags of fresh cranberries from the grocery stores and throw them in the freezer until I have time to can them. Frozen bags of cranberries are incredibly convenient. They’re usually picked and frozen at peak ripeness, locking in their flavor. Freezing also softens the skin slightly, making extracting the juice easier. Regardless of your choice, aim for quality. Look for berries that are deep red and firm to the touch. Avoid any that look shriveled or have signs of spoilage.
- Sugar – Granulated sugar or cane sugar dissolves well into the juice. About 1/3 cup per quart jar usually does the trick, but you can adjust up or down based on your taste.
- Filtered Water – Always use filtered water if possible. Tap water can contain chlorine or minerals that might alter the flavor.
- Canning jars (pint or quart): Quart jars are the standard choice for cranberry juice, though pint jars work well for smaller servings. No matter what you choose, make sure they’re mason jars or another type of canning-specific jar.
- Lids and Rings: Use sterilized jars with lids and rings for sealing.
- Jar Lifter: To safely handle hot jars.
- Funnel and De-Bubbling Tool: Makes filling jars a breeze.
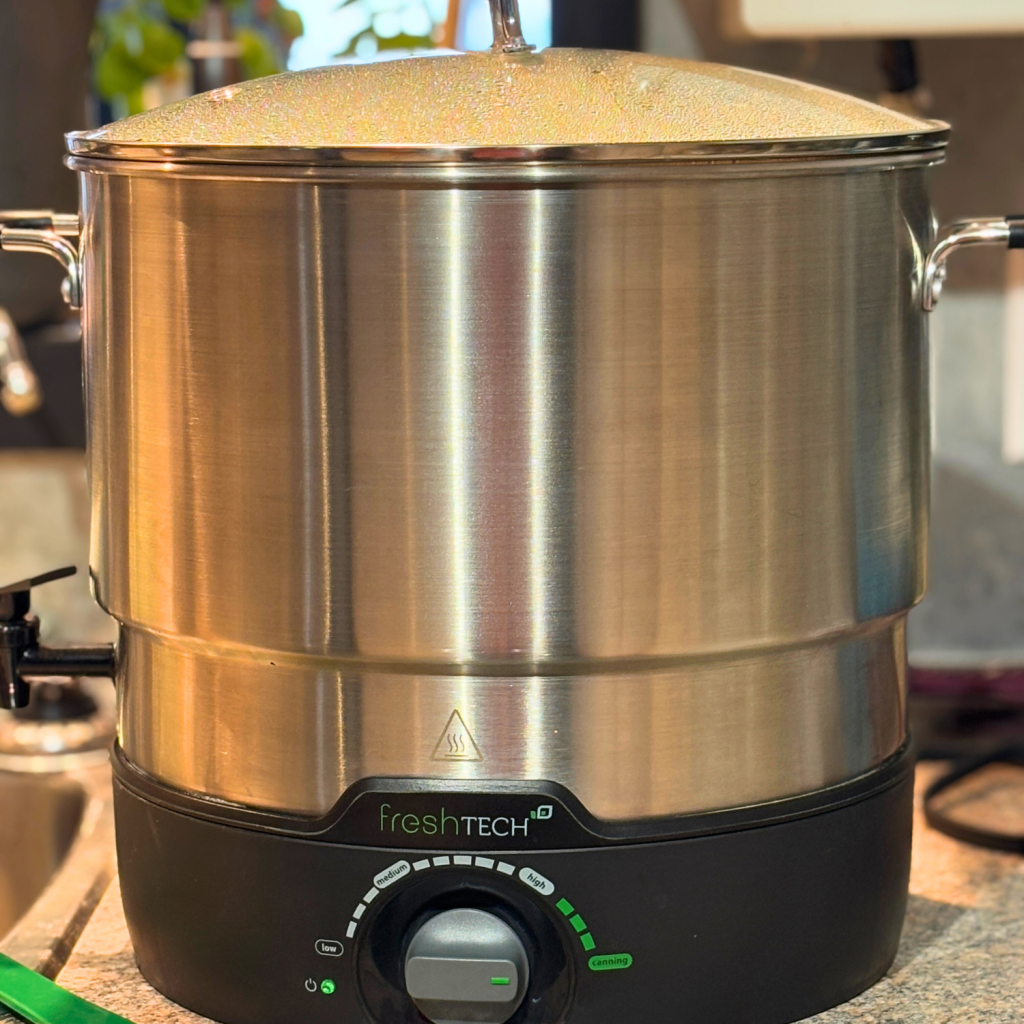
- Water bath canner: A water bath canner is non-negotiable for preserving high-acid foods like cranberry juice. I used to use a large, deep canning pot with a rack at the bottom, but I love my electric water bath canner as it frees up space on my stove. .
Step-by-Step Guide to Can Cranberry Juice
Canning cranberry juice requires just a few simple steps, but each one is essential for a safe and flavorful result. By following this guide, you’ll be able to create a rich, homemade juice that you can enjoy any time.
Preparing the Cranberries
Fresh cranberries need a little preparation before they go into jars.
- Pick through the cranberries: Spread them out on a clean surface and remove any soft or shriveled stems, leaves, or berries. Only firm, deep red berries should make the cut.
- Wash thoroughly: Place the cranberries in a colander and rinse them under cold running water. Gently rub them with your hands to remove any dirt or residue. If you want to go the extra mile, soak them in a solution of vinegar and water (1:3 ratio) for about 10 minutes, then rinse again.
Filling the Jars
Once your cranberries are prepped, it’s time to fill your jars.
- Start with clean, sterilized jars: Make sure your jars have been sterilized and are still warm. A warm jar reduces the risk of cracking when you add hot liquid.
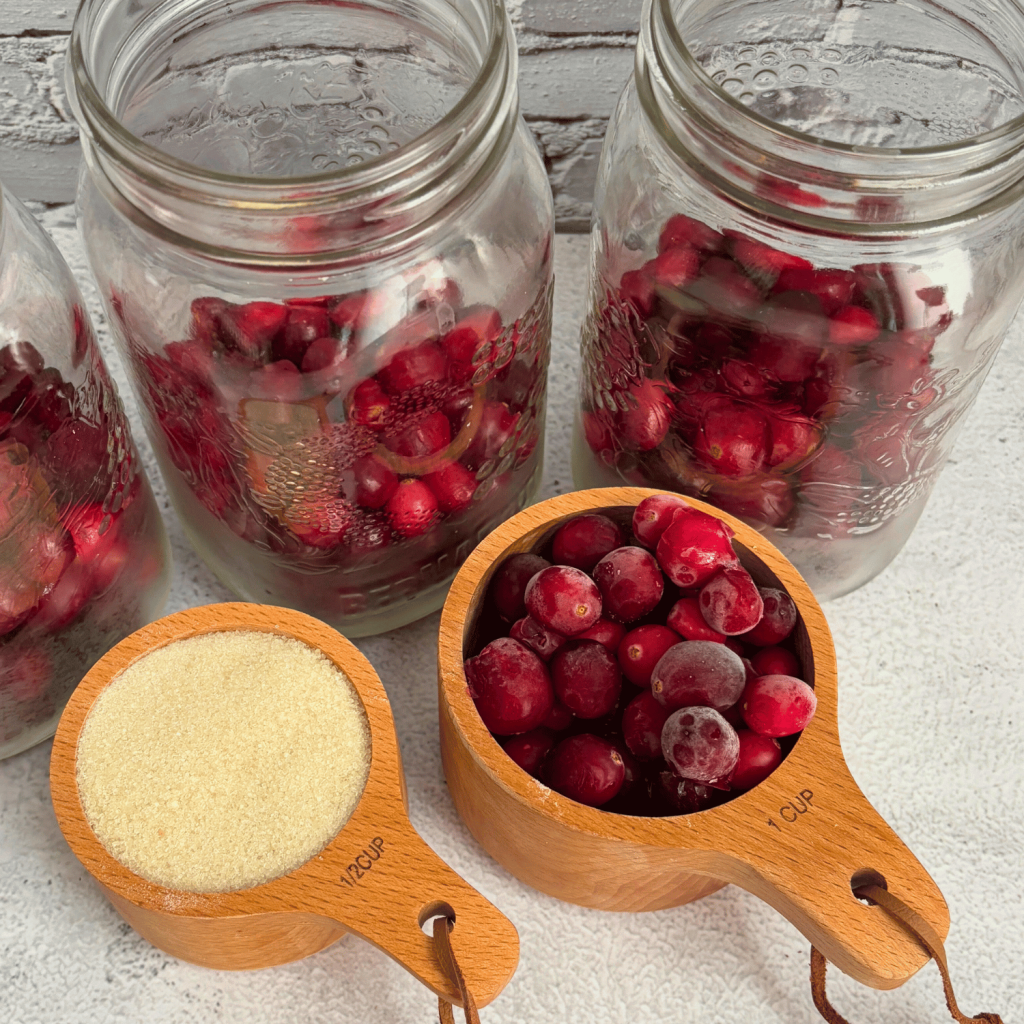
- Add cranberries: For a quart-sized jar, add about 1½ cups of whole cranberries into the jar. Reduce it to around ¾ cup of whole berries for a pint jar.
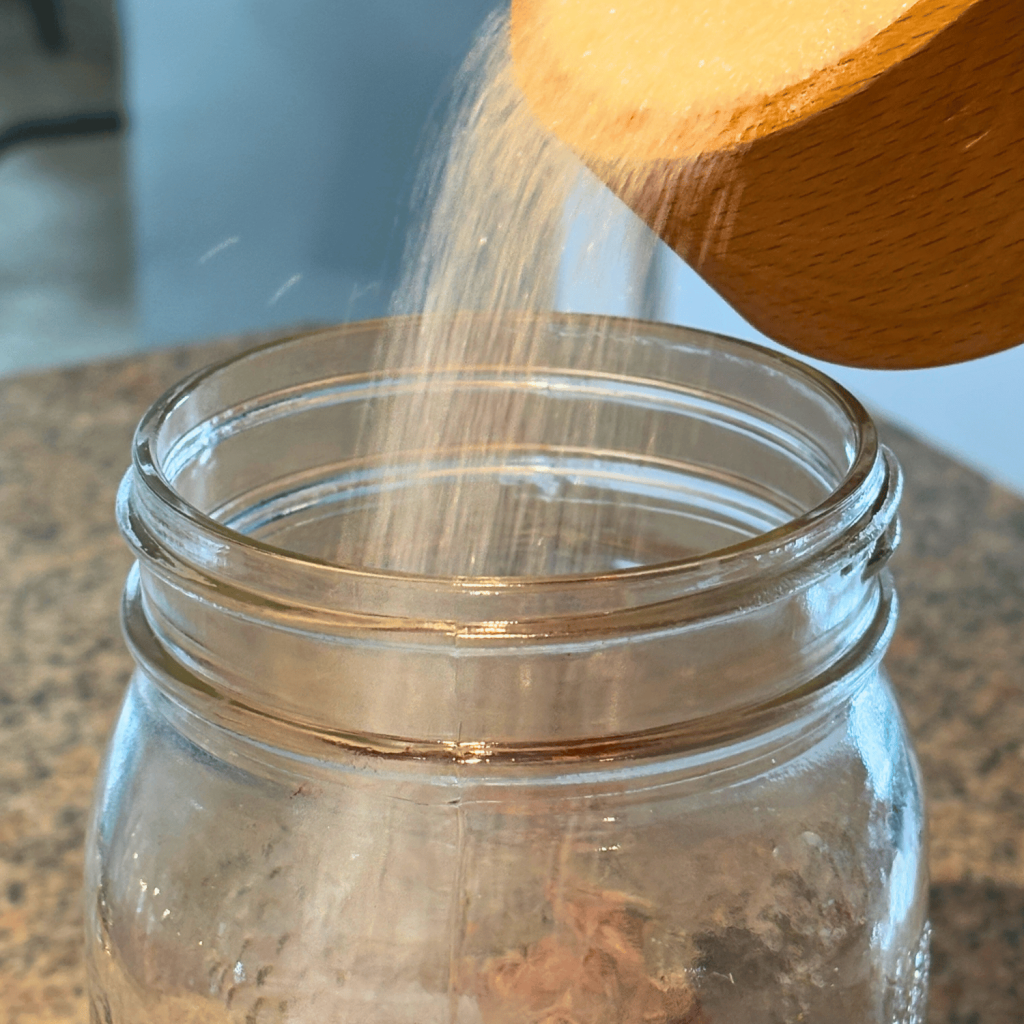
- Sweeten to taste: Add ⅓ to ½ cup of sugar per quart, depending on how sweet you like your juice. You could also skip this step entirely for unsweetened juice.
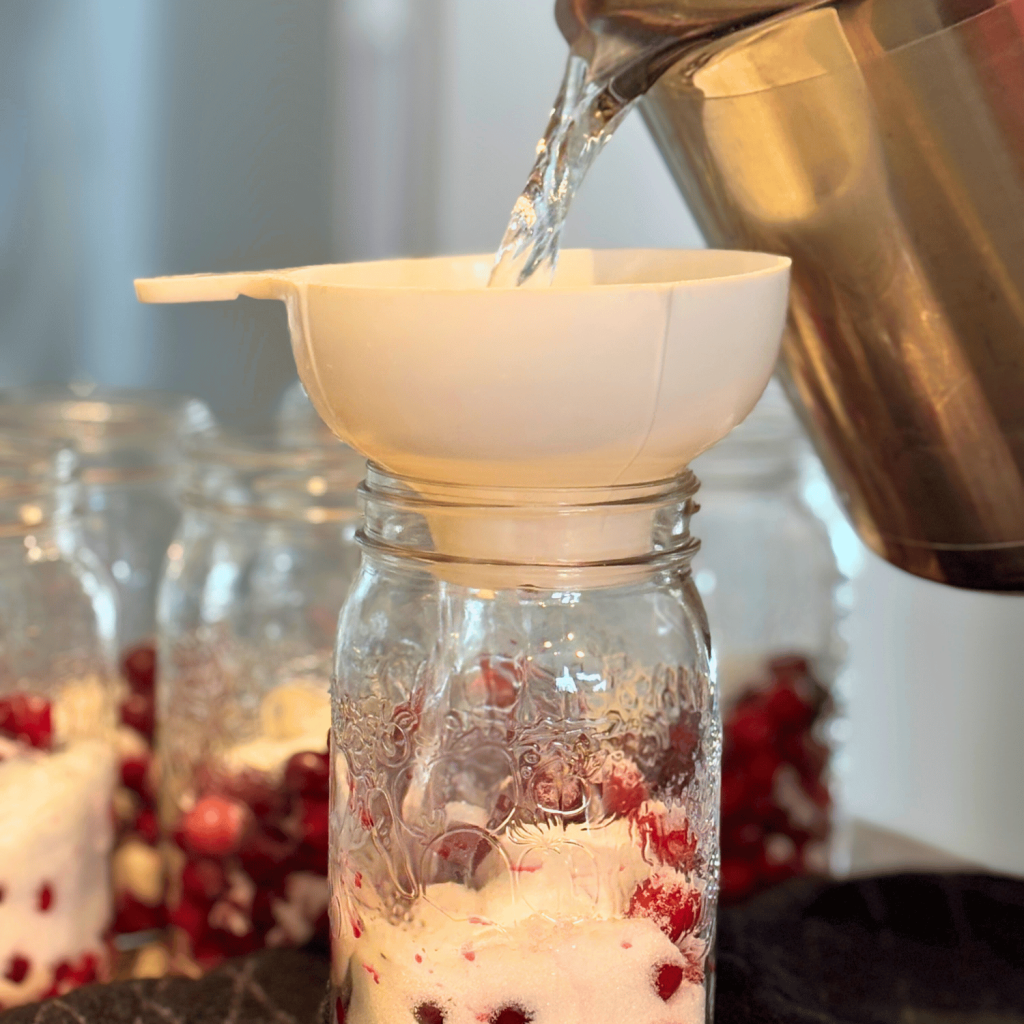
- Fill with water: Pour boiling water into the jar, leaving about 1 inch of headspace at the top. This space is critical for proper sealing during the canning process.
- Remove air bubbles: Use a non-metallic utensil (like a wooden skewer or de-bubbler tool) to stir gently and release any trapped bubbles.
- Wipe jar rims: Use a clean, damp cloth to wipe the rims of the jars to remove any sugar or juice that might interfere with the lid seal.
- Seal with lids and bands: Place a new, sterilized lid on top, then screw bands just until it’s fingertip-tight. Don’t over-tighten—this can prevent the sealing process.
Processing the Jars in a Water Bath
The water bath canning process keeps your cranberry juice safe for long-term storage. Here’s how to do it:
- Prepare your canner: Fill the water bath canner with enough water to cover your jars by at least 1-inch headspace. Start heating the water while you finish filling your jars.
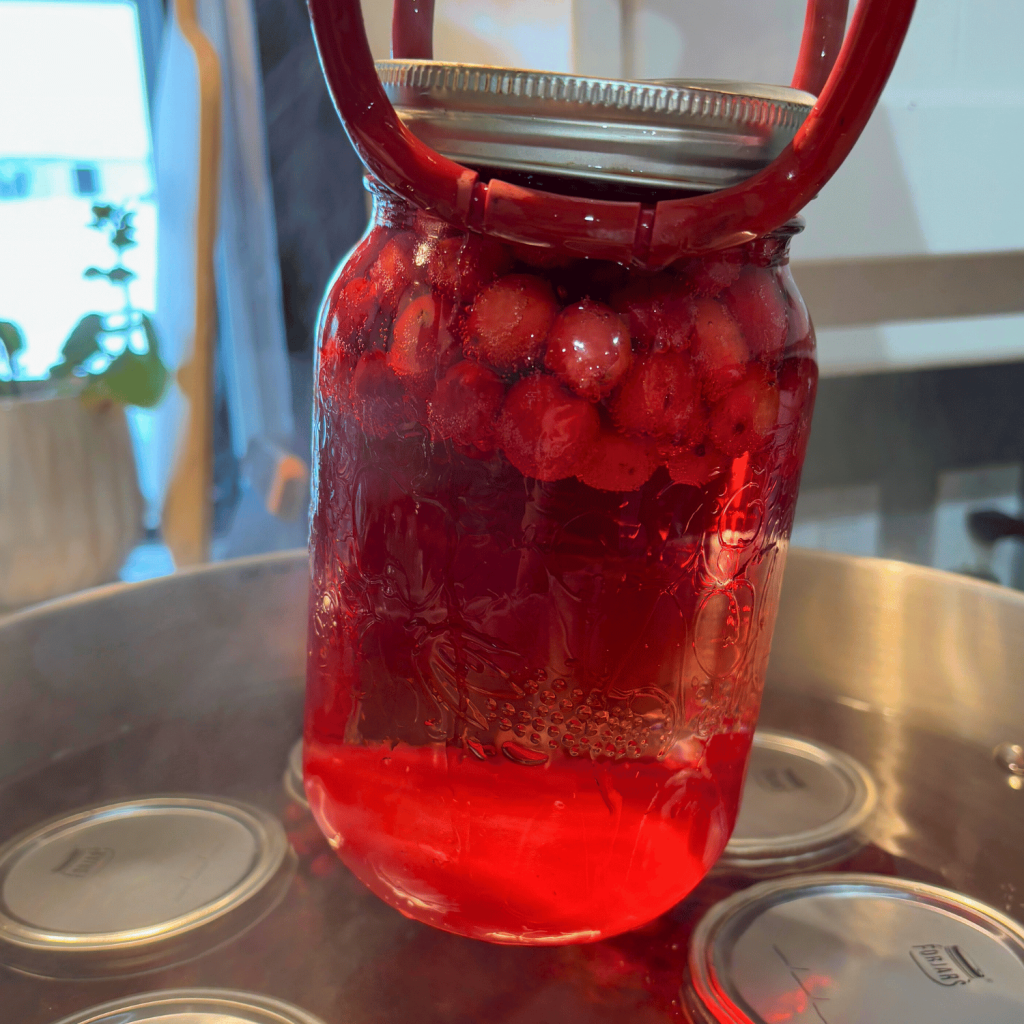
- Load the jars: Use your jar lifter to carefully place the jars on the canning rack inside the canner. The water level must be 1 inch of water above the tops of the jars. Keep them upright and ensure they are not touching to avoid breakage during processing.
- Bring to a boil: Bring the water in the canner to a full rolling boil. Once the boil starts, begin timing.
- Process the jars: For quart jars, process jars in the boiling water canner for 25 minutes. For pint jars, reduce the time to 20 minutes. Adjust for altitude if necessary (typically adding 1-2 minutes per 1,000 feet above sea level).
- Remove and cool: Use the jar lifter to take the jars out of the canner. Place them on a towel-lined surface, leaving space between each jar to allow airflow as they cool.
Cooling and Storing Canned Cranberry Juice
Canning doesn’t end when the jars come out of the bath. Here’s how to ensure they’re stored safely and properly:
- Cool: Let the jars sit at room temperature for 12-24 hours. Resist the urge to tighten the lids or move the jars during this time.
- Check the seals: Once cooled, press down on the lid. A lid with a proper seal will not pop back when pressed on. If it pops, the jar has no proper seal and should be refrigerated and used within a week.
- Label and date: Use a marker or label to write the date and contents on the jar. Cranberry juice can last up to 18 months in a cool, dark place with proper sealing.
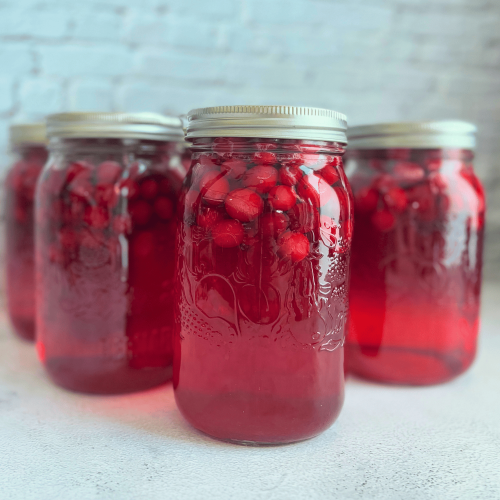
- Store appropriately: Keep the jars in a pantry or cupboard away from direct sunlight and heat. Consistent temperatures help preserve the flavor and quality..
Say goodbye to store-bought cranberry juice! You now have homemade cranberry juice ready for any occasion or to create your favorite delicious recipe!
Serving Suggestions
- Straight Up: Pour over ice for a refreshing drink.
- Mix it Up: Use as a base for cocktails or mocktails—cranberry mimosas, anyone?
- Hot Beverage: Warm it with cinnamon and cloves for a cozy winter drink.
- Smoothies: Add to fruit smoothies for an antioxidant boost.
- Cooking: Incorporate into sauces, marinades, or baking recipes.
Frequently Asked Questions:
1. Can I use frozen cranberries?
Absolutely! Frozen cranberries work as well as fresh.
2. How do I adjust the sweetness?
You can add the amount of sugar you like. Taste as you go, or leave it unsweetened for a tart option. You can sweeten it later if needed
3. Can I skip the water bath process?
No. The water bath ensures the juice is shelf-stable by eliminating bacteria and creating a vacuum seal.
4. Why didn’t my jars seal properly?
Perhaps someone didn’t clean the rims well enough, the lids weren’t hot enough, or the bands were too tightly or loosely screwed on the jars.
5. Can I reuse old lids?
It is best to use new lids each time to ensure a proper seal. Rings and jars can be reused as long as they’re in good condition.
With just a few ingredients and tools, you can create a homemade juice that’s versatile, delicious, and packed with health benefits. Whether you’re sipping it solo, mixing it into a festive cocktail, or sharing a jar as a thoughtful gift, this recipe truly celebrates the cranberry’s vibrant flavor.
So, roll up your sleeves and give it a go—with this easy recipe, you’ll not only save money but also experience the unmatched satisfaction of enjoying something you made from scratch. Cheers to homemade goodness!
Special Tools (affiliate links): Electric Water Bath Canner | Bubble Remover Tool | Jar Lifter |
If you try this recipe and love it, please tag me on Instagram and Facebook @grindinggearsfarmstead.
Lechyd Da, (means “Cheers to Good Health” in Welsh)

How to Can Cranberry Juice: Easy Homemade Recipe
Equipment
- Water Bath Canner
- Canning Jars
- Canning Lids and Rings
- Jar Lifter/Funnel/De-bubbling Tool
Ingredients
- 1 ½ cups Cranberries per quart jar
- ⅓-½ cup Sugar per quart jar
- Boiling Water
Instructions
Filling the Jars
- Start with clean, sterilized jars: Make sure your jars have been sterilized and are still warm. A warm jar reduces the risk of cracking when you add hot liquid.
- Add cranberries: For a quart-sized jar, add about 1½ cups of whole cranberries into the jar. Reduce it to around ¾ cup of whole berries for a pint jar.
- Sweeten to taste: Add ⅓ to ½ cup of sugar per quart, depending on how sweet you like your juice. You could also skip this step entirely for unsweetened juice.
- Fill with water: Pour boiling water into the jar, leaving about 1 inch of headspace at the top. This space is critical for proper sealing during the canning process.
- Remove air bubbles: Use a non-metallic utensil (like a wooden skewer or plastic knife) to stir gently and release any trapped bubbles.
- Wipe Jar Rims: Use a clean, damp cloth to wipe the rims of the jars to remove any sugar or juice that might interfere with the lid seal.
- Seal with lids and bands: Place a new, sterilized lid on top, then screw bands just until it’s fingertip-tight. Don’t over-tighten—this can prevent the sealing process.
Processing the Jars in a Water Bath
- Prepare your canner: Fill the water bath canner with enough water to cover your jars by at least 1-inch headspace. Start heating the water while you finish filling your jars.
- Load the jars: Use your jar lifter to carefully place the jars on the canning rack inside the canner. The water level must be 1 inch of water above the tops of the jars. Keep them upright and ensure they are not touching to avoid breakage during processing.
- Bring to a boil: Bring the water in the canner to a full rolling boil. Once the boil starts, begin timing.
- Process the jars: For quart jars, process jars in the boiling water canner for 25 minutes. For pint jars, reduce the time to 20 minutes. Adjust for altitude if necessary (typically adding 1-2 minutes per 1,000 feet above sea level).
- Remove and cool: Use the jar lifter to take the jars out of the canner. Place them on a towel-lined surface, leaving space between each jar to allow airflow as they cool.
Cooling and Storing
- Cool: Let the jars sit at room temperature for 12-24 hours. Resist the urge to tighten the lids or move the jars during this time.
- Check the seals: Once cooled, press down on the lid. A lid with a proper seal will not pop back when pressed on. If it pops, the jar has no proper seal and should be refrigerated and used within a week.
- Label and date: Use a marker or label to write the date and contents on the jar. Cranberry juice can last up to 18 months in a cool, dark place with proper sealing.
- Store appropriately: Keep the jars in a pantry or cupboard away from direct sunlight and heat. Consistent temperatures help preserve the flavor and quality.