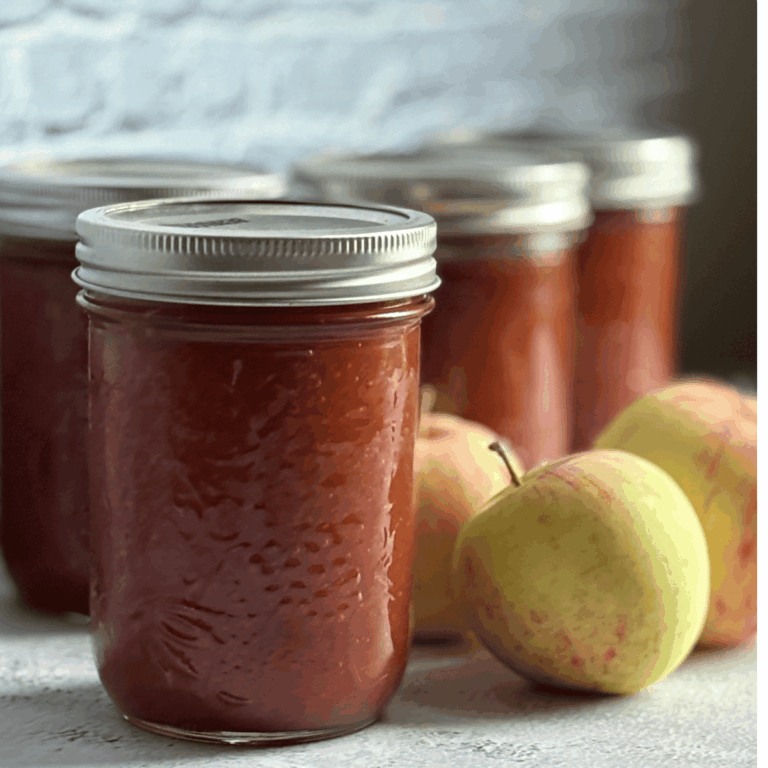
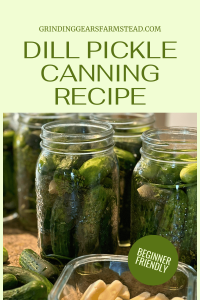
Crisp Homemade Dill Pickles: An Easy Canning Recipe
Looking to preserve the taste of summer all year long? Crisp Homemade Dill Pickles: An Easy Canning Recipe is the perfect way to capture that classic, tangy crunch with minimal effort. Whether you’re new to canning or a seasoned pro, this step-by-step guide will show you how easy it is to make your own delicious dill pickles at home. Not only is canning practical, but the satisfaction of pulling out a homemade jar when the craving hits is unmatched.
Jump to RecipeThis post may contains affiliate links. I earn from purchases at no extra cost to you. See my full disclosure here
What is Canning?
Canning is a method of preserving food by sealing it in airtight containers. This process helps protect your delicious produce from spoilage, making it last for months or even years. It involves heating the food to destroy harmful microorganisms and then sealing it in jars to keep it safe from air and moisture.
Canning Supplies
Here’s a checklist of what you’ll need to get started:
- Quart or Pint Jars: These are the stars of the show. Make sure you choose jars designed for canning, either pint-sized or quart-sized, depending on how much pickle goodness you plan to store.
- Lids and Bands: The lids are usually two-piece sets consisting of a flat metal lid with a sealing compound and a separate metal screw band. These are crucial in creating the vacuum seal that keeps your food safe. Always use new lids, never re-use lids for canning.
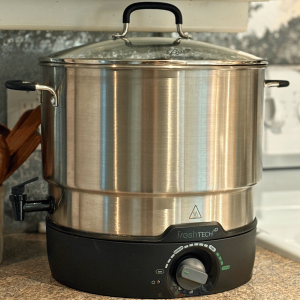
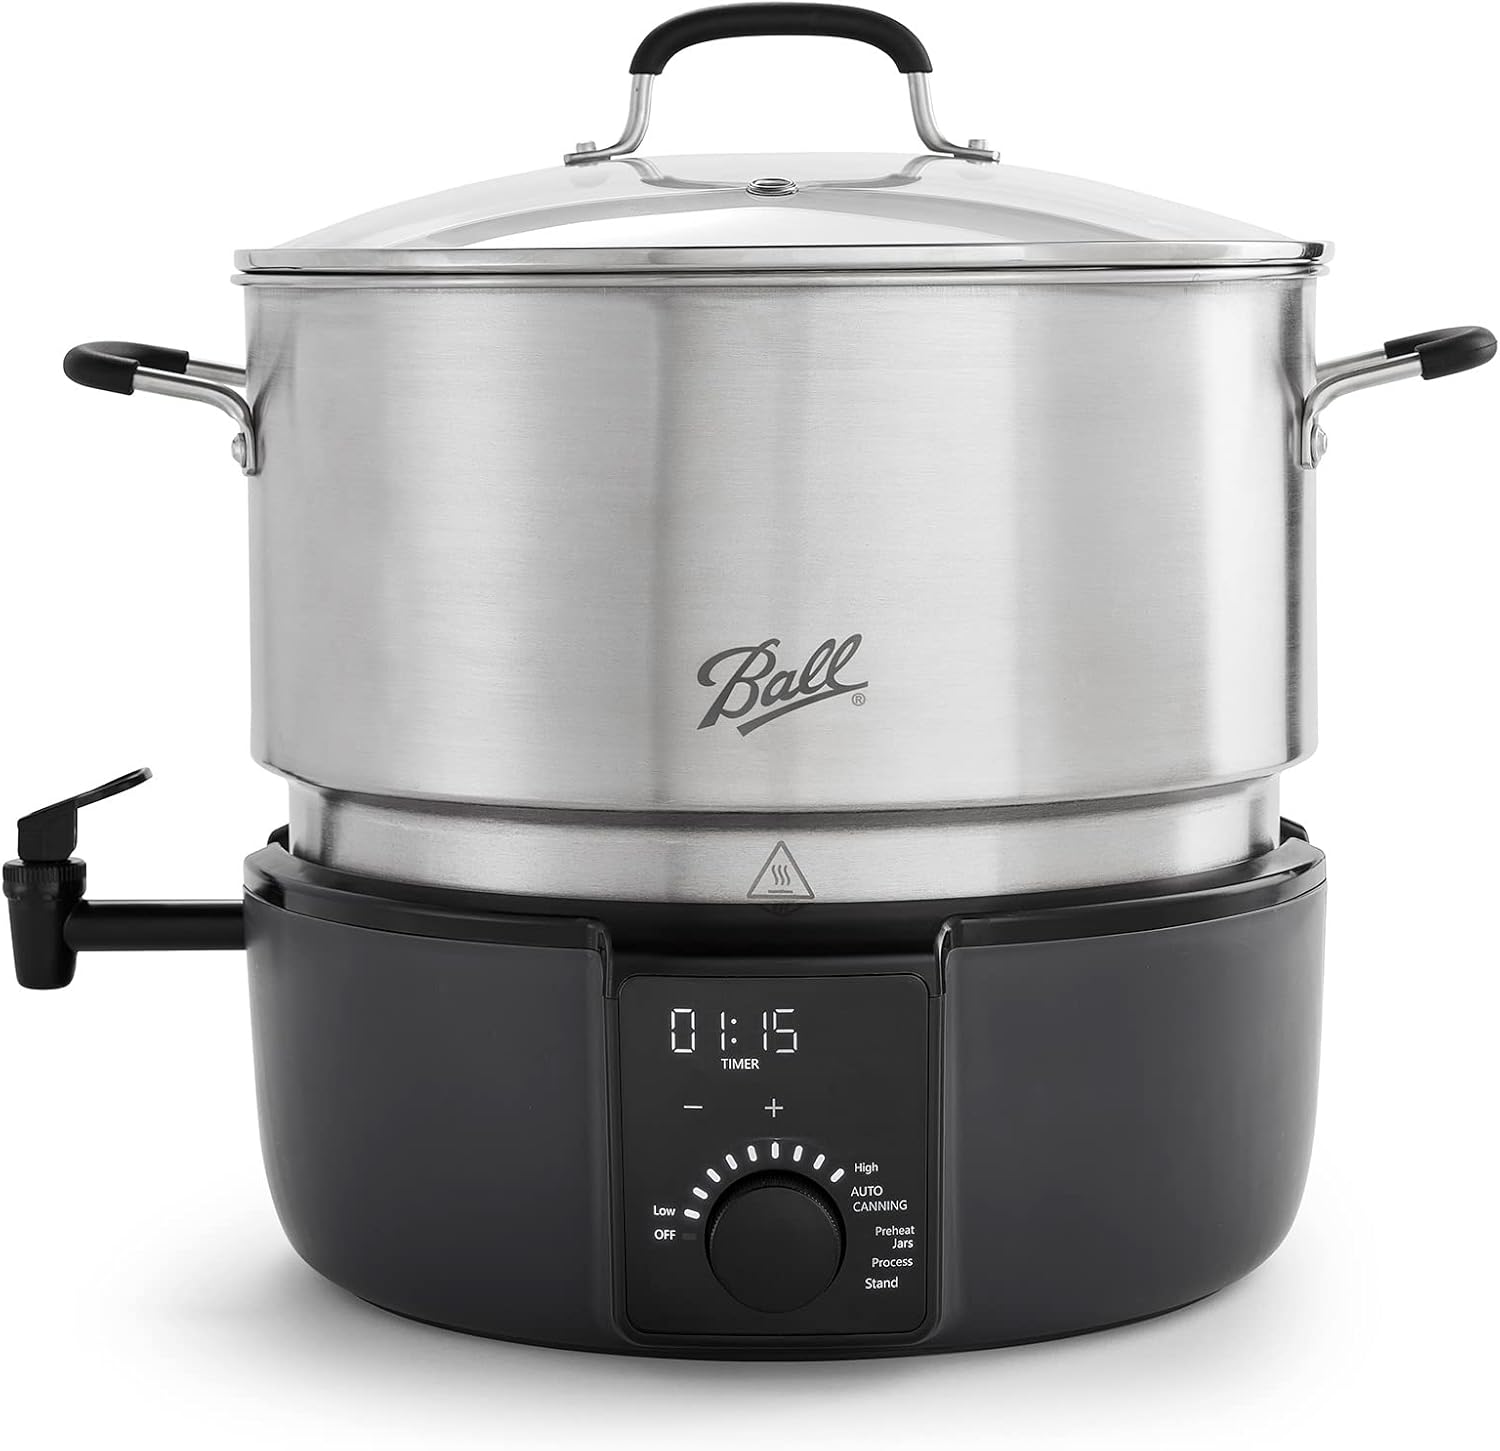
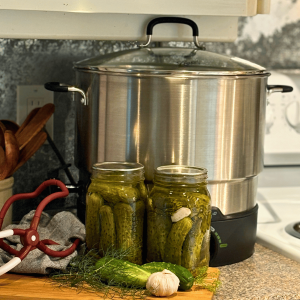
- Water Bath Canner: This large pot with a fitted rack is essential for pickling or preserving high-acid foods like fruits and tomatoes.
- Jar Lifter: This handy tool helps you safely lift hot jars in and out of boiling water without risking a kitchen disaster.
- Funnel and Ladle: These ensure your tasty brine gets into the jars rather than all over your countertop.
- Bubble Remover and Headspace Tool: This combo helps you remove air bubbles from your jars and ensures you have the right amount of headspace, which is critical for proper sealing.
With the right equipment, you can be ready to pickle and preserve your way through the seasons.
Ingredients for Crisp Homemade Dill Pickles
These essential ingredients are your key to ensuring that each jar is bursting with flavor and texture.
- Pickling Cucumbers: These are the stars of the show. Select firm cucumbers that are 3 to 4 inches in length for that perfect crunch.
- Vinegar: White distilled vinegar (5% acidity)
- Water: Distilled or water that is free from salt and chlorine
- Salt: Kosher, pickling, or sea salt works best. It’s the magic that draws out flavors. Make sure the salt you are using does not contain any anticaking agents, iodine or preservatives.
- Garlic: A few cloves will add a bold kick.
- Dill: Fresh dill heads or sprigs infuse the classic dill aroma and taste.
Extra Security to Preventing Soggy Pickles
1. Use Pickle Crisp, it is a popular additive that helps maintain the crunchiness of pickles during the canning process. Here’s how to use it when canning dill pickles: Once your cucumbers are packed into the jars and before adding the brine, sprinkle 1/8 teaspoon of Pickle Crisp granules per pint jar, or 1/4 teaspoon per quart jar. Add the brine, seal and process.
2. Use Oak Leaves Place 1-2 clean, pesticide-free oak leaves at the bottom of each jar before packing in the cucumbers. You can also tuck a few leaves in between the layers of cucumbers. Oak leaves are rich in tannins, which help maintain the crispness of the cucumbers during fermentation or canning. Tannins work by strengthening the cell walls of the cucumbers, preventing them from becoming mushy.
Using oak leaves is a natural alternative to commercial crisping agents like Pickle Crisp.
Optional Ingredients for Flavor Variations
These optional ingredients can jazz up your pickles.
- Mustard Seed: Toss in a pinch for a slight tangy pop.
- Peppercorns: Add some whole peppercorns for a subtle spicy undertone.
- Bay Leaves: One or two leaves can add a gentle herbal note and depth.
Step-by-Step Canning Recipe for Crisp Homemade Dill Pickles
Preparing the Ingredients
First it is essential to get your ingredients ready. Grab your cucumbers and give them a good rinse under cold water, removing the blossom ends of the cucumber. You want them clean and crisp, so don’t rush this step. I like to sort the cucumbers into three different bowls: small, medium, and large. Next, wash the fresh dill and peel the garlic cloves. Set aside until you are ready to pack the jars. Remember, the fresher your ingredients, the better your pickles!
Make the Pickling Brine
The heart of any good dill pickle is in the brine. Combine:
- 12 cups of water
- 4 cups of white vinegar
- 1 cup of pickling salt
- ¼ cup of sugar
Mix these in a pot and bring it to a gentle boil. Stir it well to dissolve the salt and sugar thoroughly.
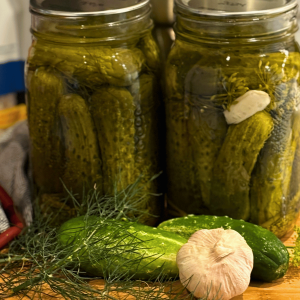
Pack Cucumbers in the Jars
Now comes the fun part: packing the jars. First, put a whole stem of dill, the whole thing, and pack it down into the bottom of the jar. The first time I saw my mother-in-law do this, I thought it would never fit.
Next, place one or two garlic cloves; this is a personal preference.
Now, it is time to add the cucumbers. Stand the larger cucumbers on end, one next to each other using as much of the space as possible. Be strategic with the size of the cucumbers, and pack them as tight as possible. You may need to use a medium or small cucumber to push down to fill in some extra spaces between the other cucumbers. This is key!
After completing this first layer, add another sprig of dill and garlic clove. You will now add medium/small cucumbers on their side in layers to fill the rest of the jar to 1-inch head space.
Pour the boiling brine over the packed cucumbers until fully covered, leaving a half an inch of space at the top. Wipe the rims with a clean, damp cloth. Place the clean lid on top of the jar followed by the rim. Tighten the rim finger tight. It is now time to process the jars!
Process the Jars
You’ll need to process the jars to preserve the pickles and keep them safe. Water bath canning is the trusted preservation method for high-acid foods like pickles.
- Place a canning rack in a large pot and fill it with water.
- Bring the water to a boil.
- Submerge the sealed jars into the boiling water. Ensure that the jars are covered with at least one inch of water.
- Bring to a boil and let them process for 10 minutes.
- Remove the canner lid. Wait 5 minutes, then carefully remove the jars using the jar lifter.
- Cool and store.
Cooling and Storing
Once the processing is complete, carefully remove the jars from the pot and let them cool at room temperature on a towel or wire rack. Don’t worry if you hear popping sounds—this is your jar’s sealing, music to any canner’s ears. Once cooled, remove the rim and store the jars in a cool, dark place—a pantry or cupboard is perfect. Let them sit for at least two weeks to build flavor before you enjoy the fruits of your labor.
There you have it!
Tips for Successful Canning
Canning your dill pickles at home can be a truly rewarding experience, not only preserving your cucumbers but also keeping the flavors fresh. With a few handy tips, you can make sure that each jar is sealed just right and has a clear, delicious brine every time.
Ensuring Safe Canning Practices
Cleanliness is not just important; it’s the superhero of the canning kitchen. Before you even think about putting that first cucumber into a jar, everything needs to be as clean as a whistle. Bacteria are the villains here, and they love to sneak into unsterilized jars, ruining your pickles before they’ve had a chance to shine. So, make sure your kitchen is spotless and your equipment is sterilized to keep those pickles safe and delicious.
- Sterilize Your Equipment: Start by washing your jars, lids, and bands in hot soapy water. Rinse them well and then boil them for about 10 minutes.
- Sanitize Your Workspace: Keep your kitchen counter and tools spotless.
Troubleshooting Common Canning Issues
Even the best of us hit a snag sometimes, and canning is no different. Don’t panic! Here’s how you can troubleshoot these hiccups:
- Sealing Problems: You might find that a lid refuses to seal. First, check the rim of the jar for any chips or residue that could block a proper seal. If there’s a problem, replace the lid and reprocess the jars. You can also place the unsealed jar in the fridge, and in two weeks you can enjoy delicious dill pickles.
- Cloudy Brine: If your brine looks like it’s been hit by a sandstorm, it might be due to excess starch or impurities from poorly washed ingredients. Use filtered water if possible, and always wash your cucumbers thoroughly.
Enjoying Your Crisp Homemade Dill Pickles
Serving Suggestions
Dill pickles aren’t just a sidekick to sandwiches; they can be the star of the show. Here are some fun and delicious ways to enjoy them:
- Snack Time Delight: Slice them into spears and serve them with cheese and crackers. The crunch and tang add the perfect contrast to creamy cheeses.
- Garnish with Style: Add pickle slices to your favorite burger or hot dog. They provide a zesty kick that elevates the whole dish.
- Salad Upgrade: Chop them up into a potato or pasta salad. Dill pickles add an unexpected burst of flavor.
- Simple Sides: Serve whole pickles with a charcuterie board that includes meats, cheeses, and hearty bread.
Creative Recipes Featuring Dill Pickles
Dill pickles can be a star ingredient in more complex recipes if you fancy being a bit more adventurous. Here are a few ideas:
- Chicken Salad with a Twist – Mix shredded chicken with diced dill pickles, mayonnaise, celery, and mustard.
- A great addition to the Big Mac Pizza
- Quick and Easy Dill Pickle Dip Recipe – Serve with pretzels or veggies for a tangy dip that is perfect for parties.
The addition of dill pickles can give ordinary dishes a zing and crunchy bite, so go ahead and experiment!
Frequently Asked Questions About Crisp Homemade Dill Pickles Easy Canning Recipe
1. How Do I Keep My Dill Pickles Crunchy?
To keep your dill pickles crunchy:
- Use fresh cucumbers: Pickled soon after harvesting.
- Soak cucumbers in ice water: For 1-2 hours before canning to firm them up.
- Avoid overprocessing: Don’t exceed the recommended processing time in the water bath canner.
- Add grape leaves or a pinch of calcium chloride: These natural crisping agents help maintain crunch.
2. What Type of Cucumbers Should I Use for Dill Pickles?
For the best results, use pickling cucumbers, which are smaller, firmer, and have fewer seeds than slicing cucumbers. Look for varieties like National Pickling or Kirby, as they hold up well during the canning process.
3. How Long Should Dill Pickles Be Processed in a Water Bath Canner?
Dill pickles should be processed in a water bath canner for 10 minutes at a rolling boil. Make sure the jars are covered with at least 1-2 inches of water and adjust processing time based on altitude if necessary.
4. What’s the Best Vinegar to Use for Pickling?
Use distilled white vinegar with 5% acidity for a classic, tangy flavor. Apple cider vinegar can be used for a slightly sweeter taste but may darken the pickles. Always ensure the vinegar has the correct acidity to safely preserve your pickles.
5. Can I Reuse Pickle Brine?
Reusing pickle brine for a new batch is not recommended. The acidity and salt levels may be too low after the first use, which can compromise safety and texture. Always start with fresh brine to ensure your pickles are properly preserved.
6. How Long Should I Wait Before Eating My Canned Dill Pickles?
For the best flavor, let your canned dill pickles sit for at least 2-4 weeks before opening. This gives the cucumbers time to fully absorb the brine and develop that classic dill pickle taste.
7. Why Did My Pickles Turn Out Mushy?
Mushy pickles can result from:
- Overripe cucumbers: Use only firm, fresh cucumbers for canning.
- Overprocessing: Stick to the recommended canning time.
- Using table salt: Always use pickling salt, as table salt contains additives that can cause softening.
8. How Should I Store Canned Dill Pickles?
Store your sealed jars of dill pickles in a cool, dark place like a pantry or cellar. Once opened, keep the jar in the refrigerator and consume the pickles within a few weeks for the best quality.
Special Tools (affiliate links): Electric Water Bath Canner |Jar Lifter |Funnel| Bubble Remover and Headspace Tool |
Pin for Later
This easy dill pickle canning recipe is a perfect step towards a more sustainable lifestyle. It’s a delicious way to control the ingredients in your food, tailored precisely to your taste. Don’t let the process intimidate you; once you experience the delight of opening your very own jar of pickles, you’ll be hooked.
If you try this recipe and love it, please tag me on Instagram @grindinggearsfarmstead.
Happy canning, happy sharing, and may your kitchen always be filled with laughter and love.
![]()
.
Easy Dill Pickle Canning Recipe
Equipment
- Water Bath Canner
- Canning Jars and Lids
- Jar Lifter
- Canning Bubble Remover and Headspace Tool
Ingredients
- Pickling Cucumbers - 3 to 4 inches in length
- Vinegar - White distilled vinegar (5% acidity)
- Water - Distilled or water that is free from salt and chlorine
- Salt - Kosher,pickling, or sea salt works best. It's the magic that draws out flavors. Make sure the salt you are using does not contain any anticaking agents.
- Garlic - A few cloves will add a bold kick.
- Dill - Fresh dill heads or sprigs infuse the classic dill aroma and taste.
Instructions
Making the Brine
- 12 cups of water
- 4 cups of white vinegar
- 1 cup of pickling salt
- ¼ cup of sugar
- Mix these in a pot and bring it to a gentle boil. Stir it well to dissolve the salt and sugar thoroughly. This brine is the magic potion that transforms regular cucumbers into tangy, flavorful pickles.
Pack Cucumbers in the Jars
- First, put a whole stem of dill, the whole thing, and pack it down into the bottom of the jar.
- Next, place one or two garlic cloves; this is a personal preference.
- Now, it is time to add the cucumbers. Stand the larger cucumbers on end, one next to each other using as much of the space as possible. Be strategic with the size of the cucumbers, and pack them as tight as possible. You may need to use a medium or small cucumber to push down to fill in some extra spaces between the other cucumbers. This is key!
- After completing this first layer, add another sprig of dill and garlic clove. You will now add medium/small cucumbers on their side in layers to fill the rest of the jar to 1-inch head space.
- Pour the boiling brine over the packed cucumbers until fully covered, leaving a half an inch of space at the top. Wipe the rims with a clean, damp cloth. Place the clean lid on top of the jar followed by the rim. Tighten the rim finger tight. It is now time to process the jars!
Process Jars in a Water Bath Canner
- Place a canning rack in a large pot and fill it with water.
- Bring the water to a boil.
- Submerge the sealed jars into the boiling water. Ensure that the jars are covered with at least one inch of water.
- Bring to a boil and let them process for 10 minutes.
- Remove the canner lid. Wait 5 minutes, then carefully remove the jars using the jar lifter.
- Cool and store in a dark place.
- Wait a least a few weeks before popping open a jar!!